Thursday, June 26, 2008

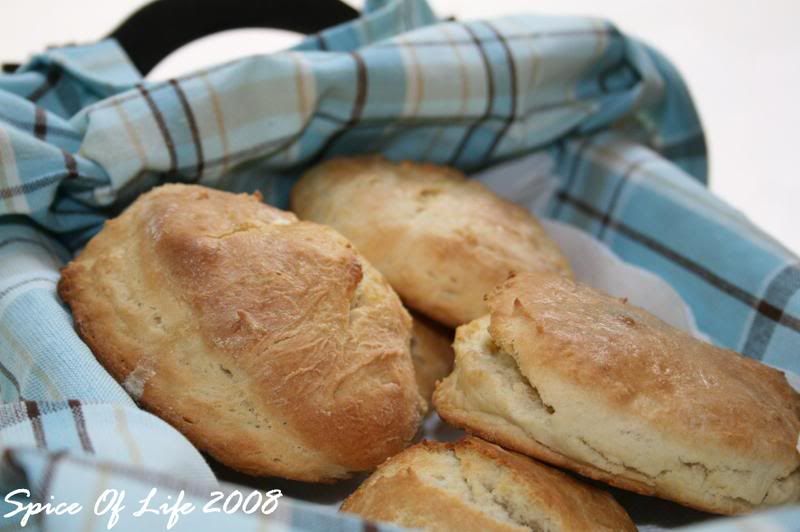
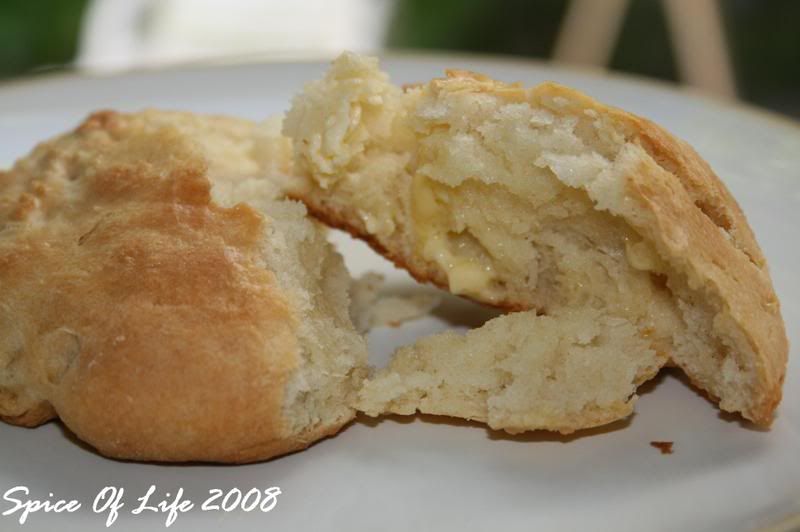
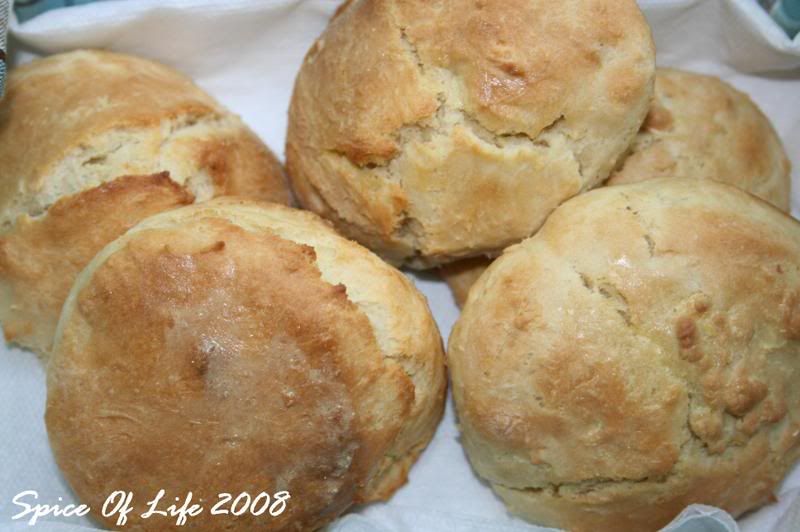
Buttermilk Biscuits

Photobucket

Here's a personal confession.

In the Philippines, biscuit or "biskwit" means, soda crackers, or crunchy cookies. Thus, naturally, I grew up believing that biscuit means the same in the US or elsewhere in the world. But little did I know that though it is spelled the same, outside of the Philippines, the word doesn't necessarily mean the same thing.


So when a franchise of Texas Chicken opened in one of the big malls in Cebu, the city in central Philippines where I come from, I was surprised to read that the menu includes: "2 pcs chicken with biscuit". Hmnn... I thought, "soda crackers with chicken? That's interesting!". So I made it a point to try, and when I did, I discovered that "biscuit" is actually a soft, round bread! And it tastes good too! That , ladies and gentlemen, was my first introduction of what "biscuit" in the western world is supposed to be.

Now that I'm based in the US, I've also discovered that what rice is to us Filipinos, is bread to the Americans. Americans (and Europeans as well)are major bread eaters, and would eat bread with everything. That's how Filipinos are too, with rice.

Well, I may have eaten countless biscuits since moving to the U.S., but I can never forget that very first biscuit encounter that I had in Cebu. That biscuit had a little honey on top that made it a bit sweeter... And to this day, that's how I like my biscuit... with a little honey and butter, reminiscent of my very first taste of this little yummy bread.

The biscuit recipe I have here is simple. The buttermilk makes this traditional Southern specialty especially light and tender. The recipe is supposed to make 12 biscuits, but since I used a 5-in cookie cutter which is slightly bigger than the usual size, I only made 8 pcs.
Photobucket

Photobucket

Buttermilk Biscuits
2 cups all purpose flour
1 tbsp baking powder
3/4 tsp salt
1/2 tsp baking soda
5 tbsp chilled butter (or solid vegetable shortening)
1 cup buttermilk

1. Pre-heat oven to 425 degrees F.
2. In a large bowl, sift together flour, baking powder, salt and baking soda.
3. Using a pastry blenderor 2 knives, cut the shortening into the flour mixture until coarse crumbs form. (or you can do this in the food processor too)
4. Turn dough out onto a lightly floured surface. Gather into a disk. Knead lightly a few times just until smooth. (Dough can be made up to 2 hrs ahead, wrapped in plastic wrap and refrigerated until ready to use)
5. Pat the dough to 3/4-in thick. Using a biscuit cuttter or a glass dipped in flour, cut out biscuits. Place the biscuits, 2 in apart, on an ungreased baking sheet. Gather dough trimmings, pat to 3/4-in thick and cut out more biscuits.
5. Bake the biscuits 12-15 mins, or until golden brown. Serve hot.

NOTE:
For flaky biscuits, take care not to overhandle the dough. For less waste and speedier preparation, pat the dough into a square form, then cut into square shapes with a floured knife.


Sunday, June 22, 2008

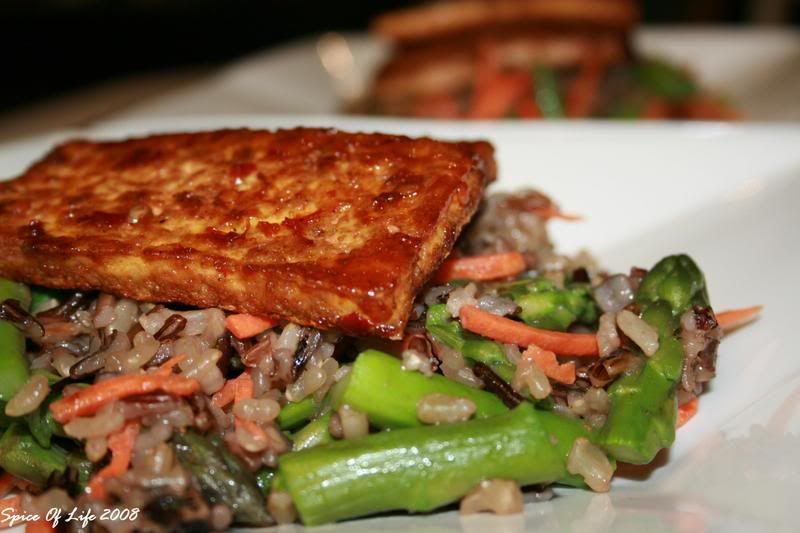
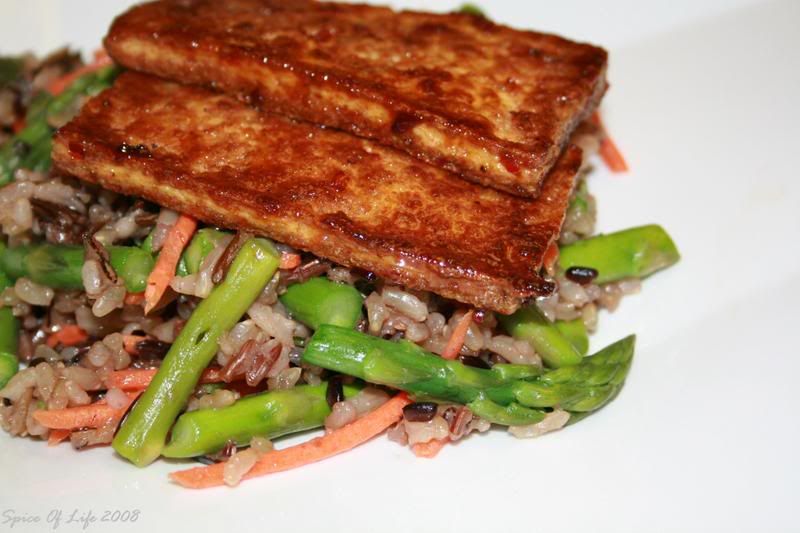
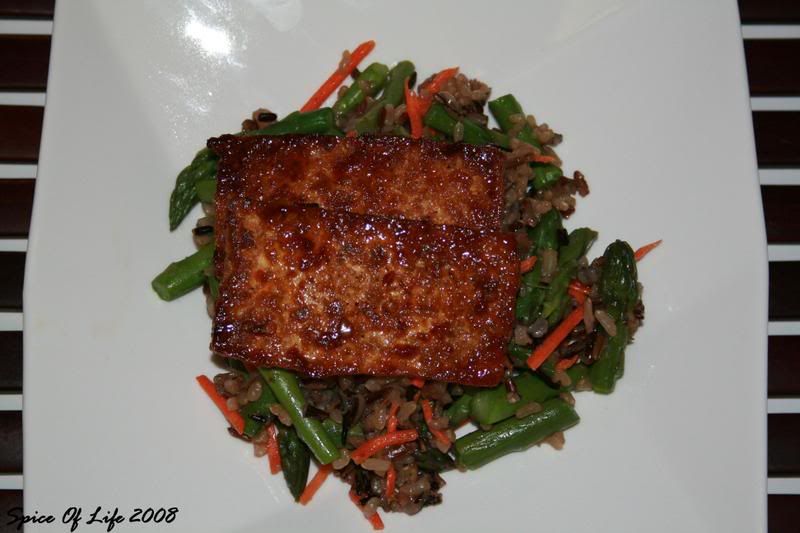
Chili-Glazed Tofu Over Asparagus And Rice

Photobucket

Every once in a while I do try to experiment and cook something vegetarian. Mr. J and I both like to watch what we eat, and vegetarian dishes make us feel like we could eat more and still feel not guilty at all.

Unfortunately, the word "healthy" in food has not always been associated with "tasty". It is only in the past few years, when different diet plans began to emerge and the organic-food revolution came about that the mindset about healthy food has changed -- that healthy could also mean flavorful, tasty food, afterall.

Well, here's one such recipe. Mr. J and I both like tofu, so this recipe is perfect for us. And instead of using white rice, I decided to use organic brown rice that has more fiber -- for good measure. Hmmn... the tofu was sweet and spicy- perfect for a light dinner. Trust me, with this dish, you won't miss meat at all!

This recipe would also be my very first entry to Fat Chef or Skinny Gourmet, a food event hosted by Ivy of Kopiaste and Ben of What's Cooking focused on diet or low-calorie foods.
Photobucket

Photobucket

Chili-Glazed Tofu Over Asparagus Rice
2 cups brown rice (I used organic brown-wild rice mixture)
2-1/4 cups asparagus, chopped 1 in. (about 1 lb)
2 cups water + pinch of salt
1 tbsp peanut oil
1 tbsp sugar
2 tbsp rice vinegar
2 tbsp low-sodium soy sauce
1 tsp fresh minced ginger (or bottled)
1 tsp hot chili-garlic sauce
1 lb extra firm tofu, drained and sliced to about 1/4-inch thick

1 tsp salt, divided
1/4 tsp black pepper
3/4 cup shredded carrot
1 tsp dark sesame oil

1. Cook brown rice according to package directions.
2. In another pot, bring 2 cups water to a boil. When boiling, add a pinch of salt and the asparagus. Cook 1 minute.
3. Take asparagus out of the hot water and straight into an ice-cold water to stop the cooking process. Let aspargus stay in water for 3 minutes. Drain and dry.
4. Combine sugar, vinegar, soy sauce, ginger and chili sauce in a small bowl.
5. Slice tofu to about 1/2 thick. Dry tofu by putting it in between paper towels and pressing it a little bit using the palm of your hand.
7. Heat peanut oil in a skillet. Sprinkle tofu with 1/2 teaspoon salt and pepper. When oil is hot, add tofu to pan, cook 3 minutes on each side until brown.

8. Add soy sauce mixture; cook 20 seconds, stirring constantly. Remove from heat.
9. Combine rice, asparagus, 1/2 tsp salt, carrott and sesame oil. Serve tofu over rice.

Saturday, June 21, 2008

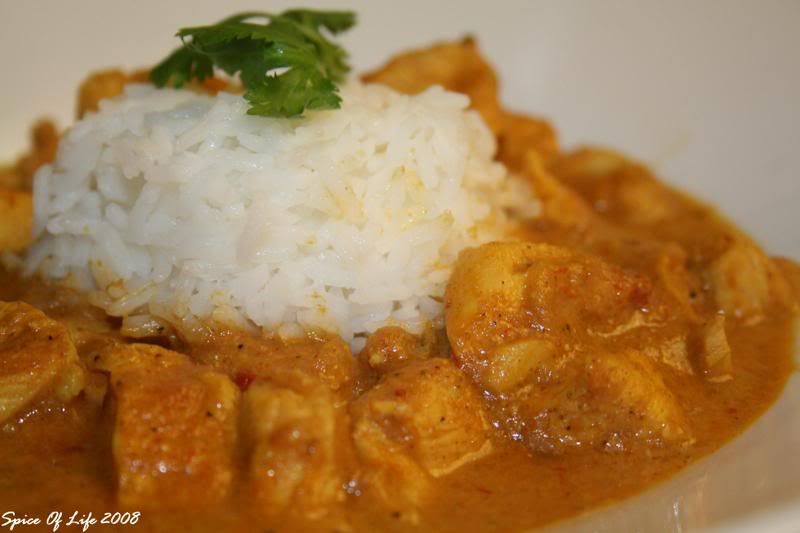
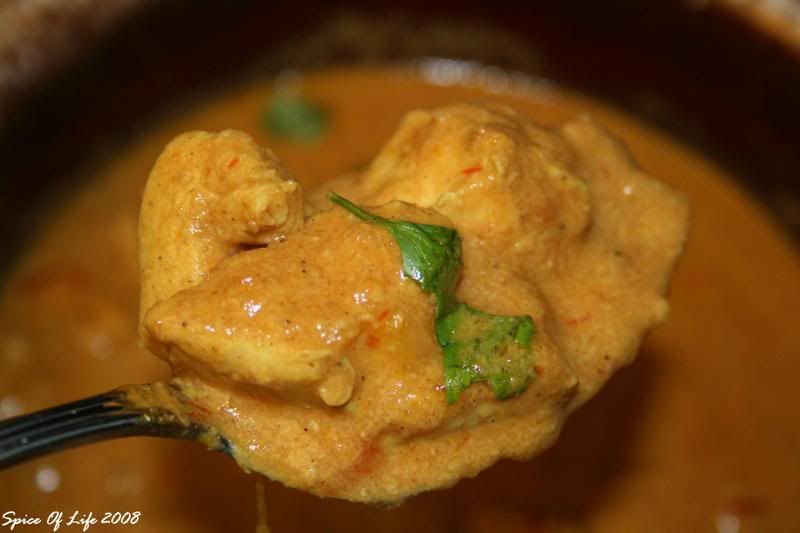
Taste & CreateXI: Chicken Cooked In Yoghurt (Dum Ka Murgh Zafrani)

It's that time of the month again. Time for Taste & Create, a monthly blogging event where partipating bloggers are partnered off with one another; the partners browse each other's blog and then they each have to cook their recipe of choice from their partner's blog. Cool huh? This blog was authored and is hosted by Nicole of For The Love Of Food.

My partner this time is Swati of Chatkhor. She's from Bangalore, India and so naturally, all of her recipes are for Indian food. She is a vegetarian, but she's started to venture into cooking chicken for her non-veg hubby. I'd say that's love right there. I enjoyed reading her posts. I can tell she's a fun person, who enjoys cooking so much. And her personality is obviously reflected in her cooking too. Swati, it's a pleasure to be partnered with you.

Now, what to cook? Obviously, we are not vegetarians, but I do cook vegetarian dishes once in a while. There are a number of recipes that I want to try from the blog, but unfortunately, a lot of the the spices the recipe call for are something that I doubt I'd be able to get here in Miami, as I don't know of any Indian specialty store around here. I also don't know what to substitute them with...
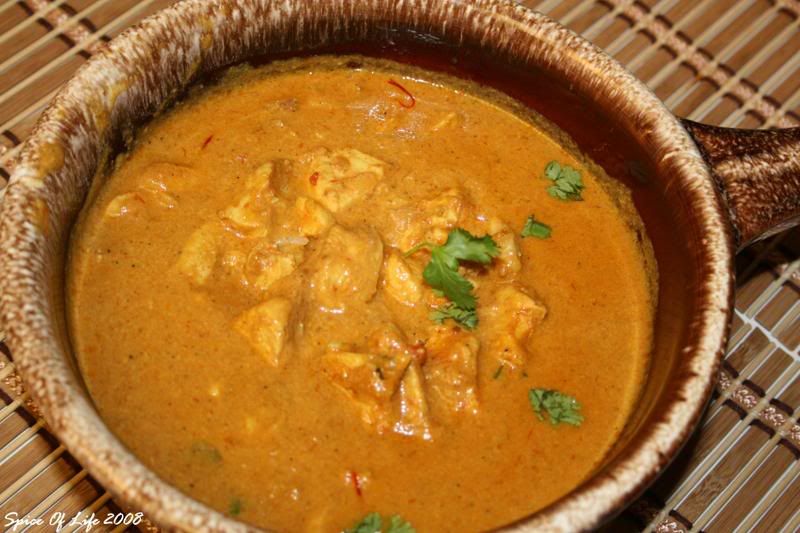
So in the end, I decided to do the recipe that Swati herself suggested - dum ka murgh zafrani, or chicken slowly cooked in yoghurt (check out the recipe here)... Doesn't the Indian title alone intrigue you?

Looking at the recipe, I knew right away that it would be a very rich dish. What with all that butter, yoghurt, milk and cream required... whew! So I had to tweak the recipe, just to control the fat content just a little bit. First of all, I used a skinless, boneless chicken breast. We usually don't eat the chicken skin anyway so there's no point in having it in this dish. Also, instead of using 1 cup of clarified butter as called for, I decided to only use 2 tbsps of butter, mainly for flavor, and a couple tbsps of olive oil. For the milk, I opted to use 2% instead of the full cream milk. Also, the yoghurt I used was non-fat. I had to do all these because Mr. J is watching his cholesterol level, so this is important if I were to feed him this dish. And for the fresh cream, I substituted it with heavy whipping cream using only half of what's required. And I have to admit.. I cheated a little bit too. I chose to use canned, peeled and crushed tomato instead of pureeing one from scratch. Not only did I saved a fraction of time, but I've also got lesser dishes to wash this way. I thought that was smart of me, wasn't it?
:o)

I don't think the changes I made affected the flavor of this dish at all. In my humble opinion, it's really all the spices that make this dish. The sauce still came out thick and creamy due to the addition of the almond paste and the pureed tomato. At first, I was kind of iffy about the almond paste. I thought almond paste is only for desserts. I never knew that it could be added on to savory dishes as well, but now I know better.. haha! The paste added a slight almond taste to the dish, but not overpowering. And it made this dish a bit sweeter as well, which is a nice balance to all the different spices going on in this food.


As it is only Mr. J and I at home, I decided to cut the recipe down into half. But even with half a recipe, it still made a lot, especially the sauce! But you know what, this food tastes better the next day, so I am not complaining.

Cooking this dish transported me back in time when I was hanging out with pals from New Delhi (India) and Katmandu (Nepal). Almost 10 yrs. ago, I was in a scholarship program in Germany, which was sponsored by the German government. I got close to my colleagues from India (there were 2 of them) and Nepal. The smell of this dish as it cooked made me remember those good ol' times when my friends would cook dinner, or at other times, when we would have Indian theme nights. We would go out to eat at Indian restaurants (in Germany), and watch Indian movies afterwards. Oh, I miss those fun times with them. I still communicate with these friends up to now, actually.

Anyways, before I get carried away too much..... This dish is similar to curry, except that there is no curry in it. It had all the spices that one would expect in an Indian dish. The chicken was creamy and dreamy and I served it with plain boiled jasmin rice garnished with cilantro... Yum! My husband, who thought it was spicy, was surprised because the dish is milder than he had expected and slightly sweet. He actually liked it...Life is good.... Thanks, Swati, for a great recipe!

Saturday, June 14, 2008

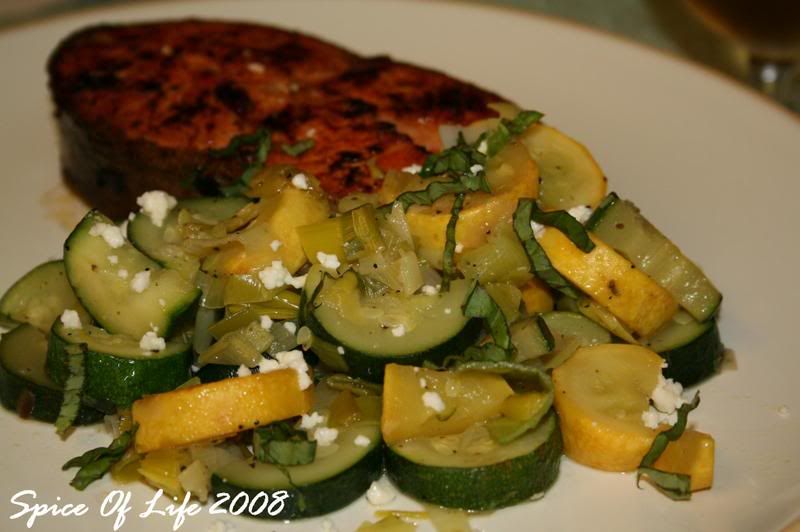
Zucchini And Squash With Basil And Feta

Photobucket

The most rewarding part about cooking is seeing people enjoy your food. I'm sure anyone who cooks would agree with me on this, am I right? What I struggle most about it though, is putting a menu together. Well, if I went to culinary school this story would have been different but I didn't. I just have to learn this area vicariously through restaurants, TVs and magazines while relying a lot on my (and Mr. J's) tastes buds.

Personally, I am not picky and in the least bit particular about the pairing of my food. My philosophy is, it will all get mixed up in your stomach anyway. Thankfully, Mr. J is not picky as well. He's game, he'll try anything. I'm proud to tell you that he's even tried eating "bulad" - the dried, salty fish in the Philippines, which a lot of foreigners find really repulsive (it has a strong fishy smell when being cooked). I still have to convince him to try our world famous "balut" delicacy though, or the fermented duck's eggs with the embryo in it. Hahahah.. sorry if I gross you out, but the truth is, a lot of people in the Philippines enjoy this delicacy. (I don't though, so that's why I don't have the right to push Mr. J to try it himself) Balut is supposed to have a lot of nutrients and is believed to be an aphrodisiac as well. Hmmmn..

Back to my food today. When you're a career lady, the last thing you want is to spend a long time in the kitchen when you get home from work. I don't know about you but I don't. Much as I like to cook, when I 'm from work I just want to relax. That's why if you notice, majority of my recipes are simple and quick to do but without sacrificing the taste.

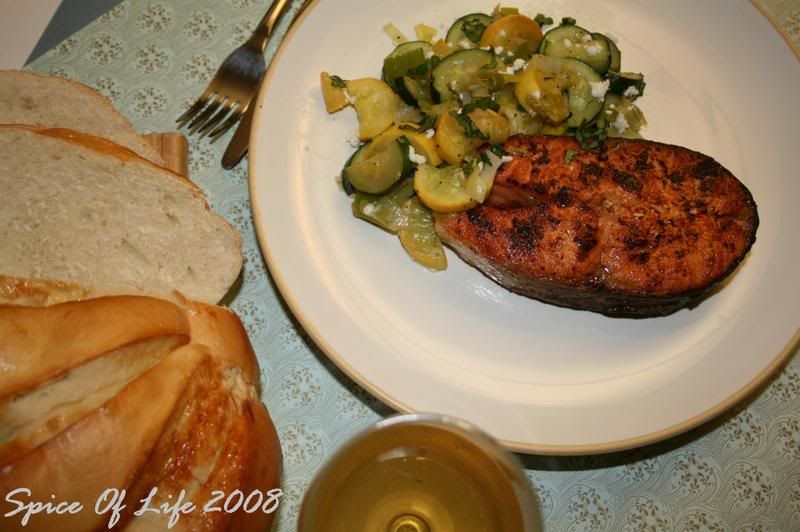
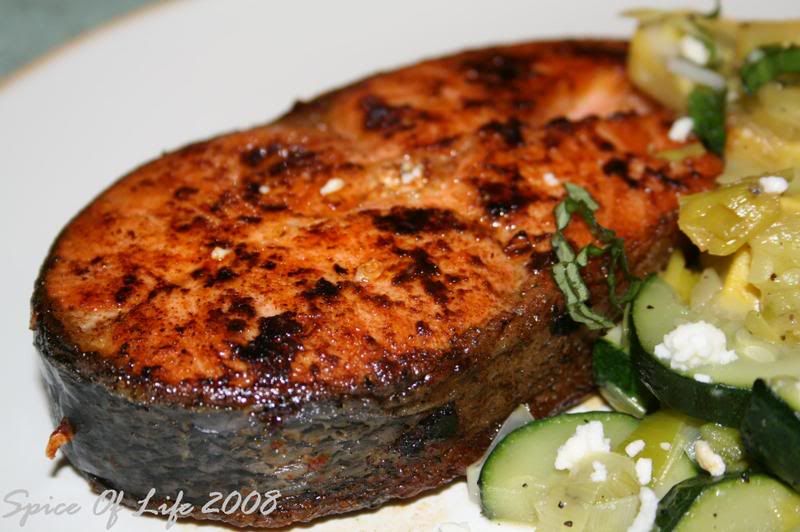
So here's a simple side dish that is quick, flavorful and healthy. I served it with a blackened salmon steak cooked in a cast iron pan. Hope you like it.


Photobucket
Zucchini And Squash With Basil and Feta
Adapted from Cooking Light

1 tablespoon olive oil
1 tbsp unsalted butter
2 cups zucchini, sliced
2 cups of baby pattypan, halved
2 cups leeks, sliced (about 2)
1/2 tsp salt
1/8 tsp freshly ground black pepper
3 tbsp feta cheese, crumbled
2 tbsp fresh basil, cut into strips (chiffonade)

1. Heat a large non-stick skillet over medium high heat. Add oil and butter to pan, swirling to coat.
2. Add squash/zucchini and leek to pan; saute for 5 minutes or until tender, stirring frequently.
3. Stir in salt and pepper.
4. Transfer squash mixture to a serving platter. Sprinkle with cheese and basil.

Salmon
1. Sprinkle salmon steaks with salt and pepper on both sides.
2. Heat your cast iron skillet to medium high. Add about a tablespoon of oil, just enough to coat the pan to make sure fish does not stick.
3. When skillet is hot, add the fish. Fry 4 mins on one side or until done. Do not overcook or salmon will get dry.
4. Serve with lemons, if preferred and the side dish above.


Saturday, June 7, 2008

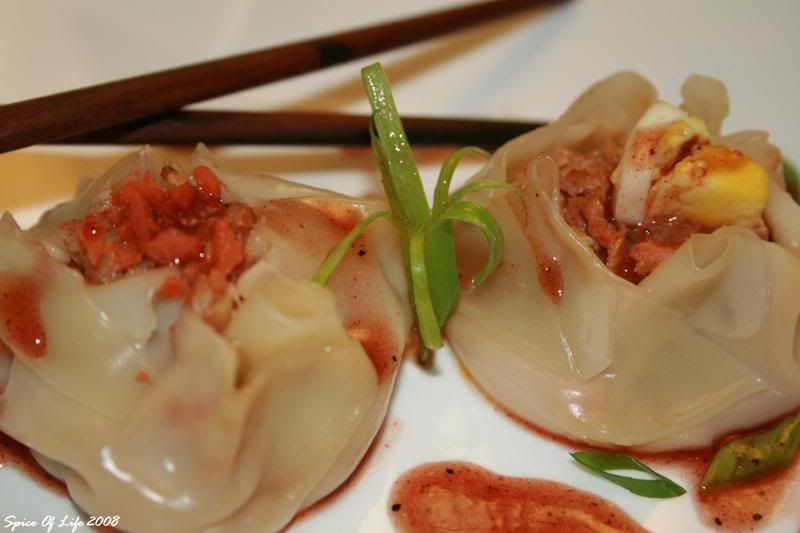
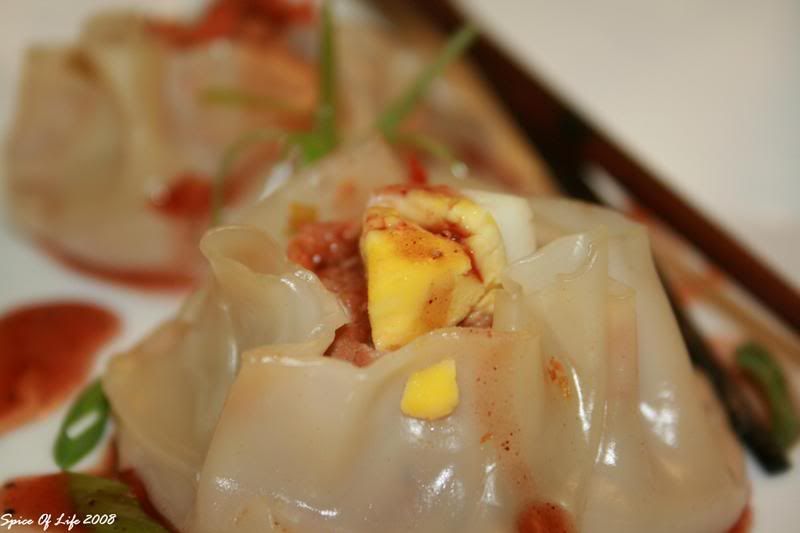
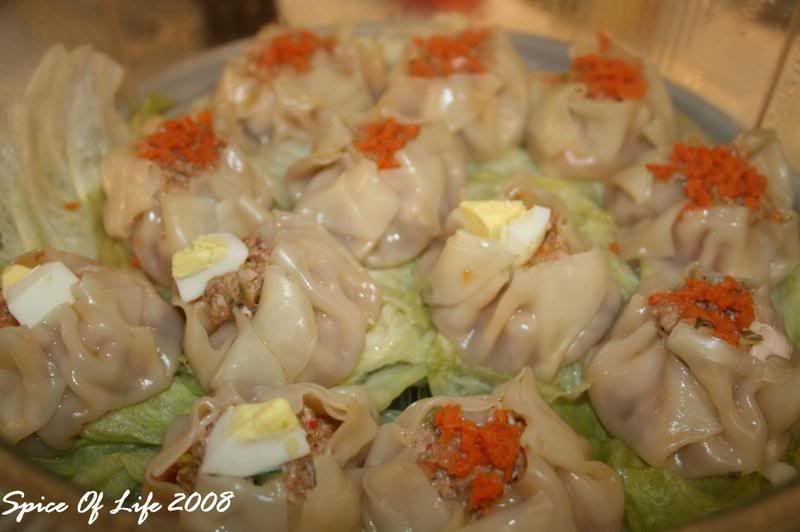
Steamed Pork Wonton Dumplings (SioMai)


SioMai (shoo-mai) commonly known as steamed dumplings, is one of the dishes brought to the Philippines by the Chinese immigrant, Ma Mon Luk. I told you about his inspiring story two posts ago. If you didn't get to read it, check it out here.

This food is a dimsum staple in China or Hongkong. What I like about this dish is the fact that it is steamed. Steaming leaves the ingredients' essential flavors and textures intact. Also, it is a healthier way to cook, yes?. It does take lot of time to prepare, so as a warning, do this way ahead of time when your tummy has not began churning yet. The actual steaming of these wonderful little bites don't take time, it's the stuffing and wonton wrapping action that does require a bit of patience.

As you know, Asian cuisine is characterized by a lot of chopping, dicing, wrapping or rolling. Really, it's the preparation part that is more time consuming than the actual cooking in itself. But hey,if you love Asian food, then it's going to be worth your effort.


You can serve these dumplings as appetizers, but my hubby and I often eat these for dinner, with a simple noodle soup perhaps. These yummy little things are light but filling.

The recipe below really is for you to learn the method more than anything else. These dumplings are so versatile that you can change up anything from the meat, to the vegetables and the topping.

Here, I used shredded carrots and boiled eggs as toppings. But you can also use shrimps, mushrooms, crabmeat, chopped scallions or quail eggs, or anything that might strike your fancy.

You can eat these with or without the dipping. But I love dips and sauces, so I chose to make a simple dip to go with my dumplings. There are many options to use as a dipping sauce. There is the bottled Thai/Chinese sweet chili sauce, or just the Hoisin sauce. What I did this time is a mixture of Hoisin sauce thinned out by a bit of lite soy sauce, and I added a bit of the garlic-chili paste for a little kick. If you want your sauce to be a little bit sweeter, you can either add more Hoisin, or add just a touch of honey.

Steamed Pork Wonton Dumplings
1 pound ground pork
1/2 cup carrots, shredded
1 (5 oz) can water chestnuts, strained
1/4 cup scallions, coarsely chopped
2 cloves garlic
1 tbsp fresh ginger, coarsely chopped (about 1-inch size)
1 tablespoon sesame oil
1 egg, beaten
2 tbsp soy sauce
3 tablespoon oyster sauce
1 tbsp chili-garlic sauce (optional)
1 (16-ounce) pack wonton wrappers
Savoy or Napa cabbage for lining *

1. Throw in the food processor the carrots, garlic, ginger, chestnuts. Pulse a few times until vegetables are finely minced. You can also do the mincing by hand. The important thing is that thye veggies are minced finely.
2. Pour the processed vegetables in to a large bowl. Add the scallions, sesame oil, egg, soy sauce, oyster sauce and chili sauce (if using). Mix well.
3. Add the ground pork to the bowl and mix thoroughly, making sure that the spices and veggies are thoroughly incorporated. Do not overmix meat.

4. Working with one wonton wrapper at a time, (cover the rest with a damp paper towel to prevent from drying), spoon about 1 tsp meat mixture to the center of each wrapper. Moisten the edges with water.
5. Gather up and crip the edges of the wrapper around the filling; lightly squeeze to adhere to filling, leaving top open. Place your topping on top and gently press into the filling. Place dumpling on a baking sheet; cover loosely with damp towel. Repeat procedure.
6.Line your steamer with the cabbage leaves. Arrange dumpling over the leaves, 1 inch apart
7. If using a bamboo steamer, add water to skillet,about 1 inch deep; bring water to boil. Place steamer in pan and steam dumpling for 15 minutes or until done.
8. Remove dumplings from steamer. Serve warm with the dipping sauce. Discard cabbage.

*NOTE: Lining the steamer with cabbage leaves ensures the dumpling won't stick to the bottom of the steamer.


Tuesday, June 3, 2008

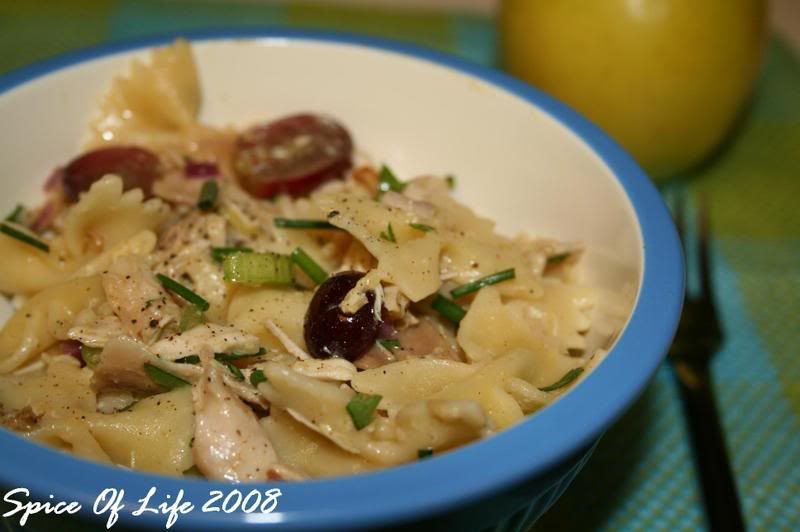
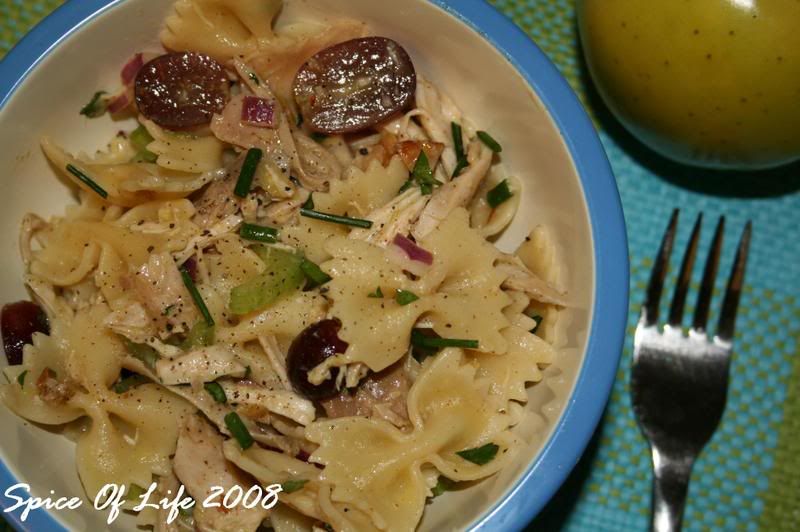
Roasted Chicken With Bow Tie (Farfalle) Pasta Salad


What's for lunch? This is a question that Mr. J and I ask ourselves everyday. And do we have as options? McDonalds. Wendy's. Taco Bell. Burger King. KFC. Pizza Hut .... and countless other fastfoods. These are what confronts us as we contemplate on what to eat for lunch at work everyday.

I have nothing against fast foods. They are convenient and delicious! But the fact remains, they do you no good, especially when eaten on a daily basis. I'm sure you are aware of this, so I don't have to elaborate on the reasons why. Suffice it to say that if you indulge on fastfood often enough, your buttons will have to eventually explode while your wallet implodes! Hah! (I was alluding to your physique expanding sideways and your wallet being empty, get me?). Not a pretty picture, huh?

This is exactly the reason why we cook a lot at home. The same reason why I made this dish today especially for Mr. J. I wanted to give my dear hubby a good but healthier alternative to his lunch. This pasta, coupled with a piece of fruit for dessert is definitely a much better option.


Bow Tie Pasta With Roasted Chicken Salad
Adapted from: Cooking Light

3 cups uncooked farfalle (bow tie pasta), about 8 oz.
1/3 cup fresh orange juice
1/4 cup fresh lemon juice
2 tbsps extra virgin olive oil
1 tbsp stone-ground mustard
2 tbsps sugar
1-1/4 tsps salt
1/2 tsp freshly ground black pepper
1-1/2 tsp rice vinegar
2 cups shredded cooked chicken breast (about 2 pcs)*
1-1/2 cups red seedless grapes, halved
1 cup celery, thin cut diagonally
1/3 cup red onion, finely chopped
1/3 cup walnuts, chopped and toasted
3 tbsps fresh chives, chopped
2 tbsps fresh parsely, chopped

1. Cook pasta according to package directions. Omit salt and fat. Cool.
2. Combine orange juice and the next 7 ingredients (thru vinegar) in a large bowl, stirring with a whisk to combine.
3. Add cooled pasta, chicken, grapes, celery, red onion, walnuts, chives and parsley. Toss gently to combine.

*NOTE: For an even quicker preparation, use rotisserie chicken from the deli like i did. I made it the night before and threw in the dressing in the morning before hubby leaves for work. This is an excellent way to use left-over chicken from dinner.

Sunday, June 1, 2008

Siopao (Steamed Buns)


“Siopao or baozi” is a staple food in China that dates back to almost 1,800 years, about three kingdom periods (220-280) ago. According to history, some military soldiers caught a plague while traveling to South China. Zhuge Liang (181-234), the military strategist at that time, invented this food which is to be offered as a sacrifice to the gods for healing . They are buns shaped like human heads and are made of flour stuffed with meat filling. Interesting, huh?

Overtime, this food has become typical in Chinese households. They are usually served as dim sum, or those fingerfoods served with tea.

In the Philippines, siopao, along with mami (noodle-soup) and siomai (steamed dumpling) came from a tale of triumph by a Chinese immigrant named Ma Mon Luk. Ma Mon Luk is said to be a grade school teacher in China who was in love with a girl name Ng Shih. But the girl's family objected to their love, because Ma Mon Luk financially is not good enough. As a result, Ng Shih's father forbid her to marry Ma Mon Luk. Ng Shih had no choice but to obey her father regardless of her feelings for Ma Mon Luk.


Heartbroken, Ma Mon Luk decided to quit his teaching job and traveled to the Philippines in 1918. His purpose was to earn money, and be able to prove to Ng Shih's family that he was worthy of her.


It was not an easy feat for Ma Mon Luk. He was jobless and broke when he got to the Philippines. But he decided to use what he had - his rich culture and knowlege and did what he knew best, prepared the food he grew up with and began peddling them in the streets. With determination and hardwork, Ma Mon Luk succeeded in introducing dishes that were to become an indelible part of the Filipino's history, culture and diet - the mami, siomai and siopao.

Today, these remain to be among Filipino's favorites. And they are found in many Chinese restaurants in the country, as well as in most little eateries that dot the busy streets of the Philippines.
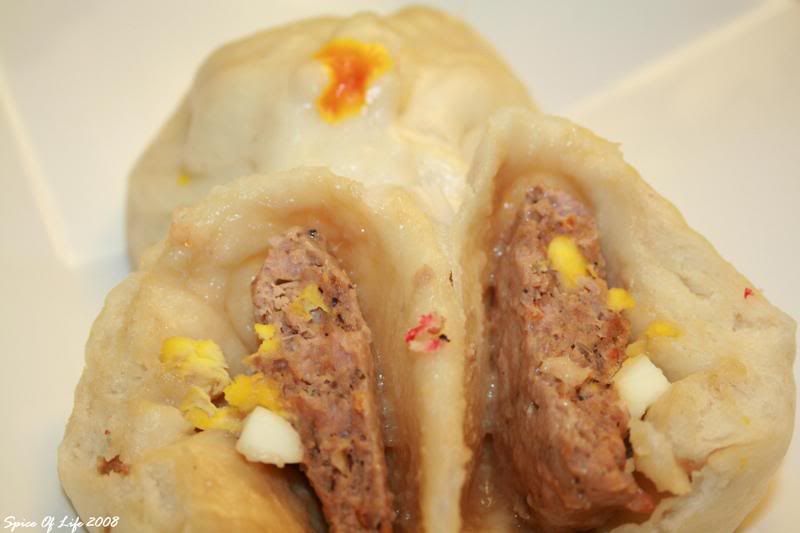
Bola-bola filled (meatball & egg) siopao
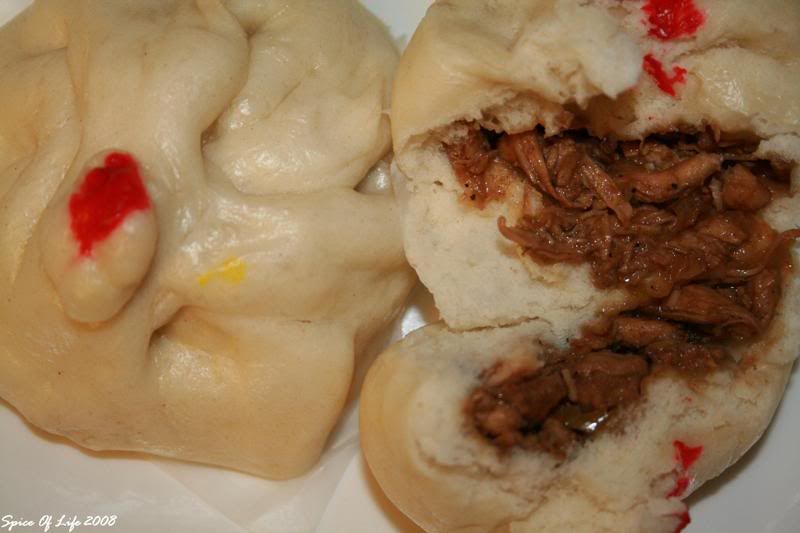
Chicken-filled siopao

As for me, Siopao is still one of my favorite snack food. Whenever I go back to my homeland, I never fail to have some of them. I love the soft, slightly sweet, almost cake-like dough. To me, the dough is what makes this dish.

I can always buy them frozen from every Asian grocery here in the U.S., but there is nothing like a home-made, fresh-from-the-steamer-siopao goodness. It may be bit time consuming to make, but the result is very rewarding.

Here I made two of my favorite filling, the meatball and the chicken. But there's a whole lot of other fillings for Siopao. You can substitute the chicken with pork. Or you can use Tofu and add some vegetables for a vegetarian siopao (using carrots, green beans, bean sprouts,cabbage). Another one of my favorite filling is using mashed Mung beans.

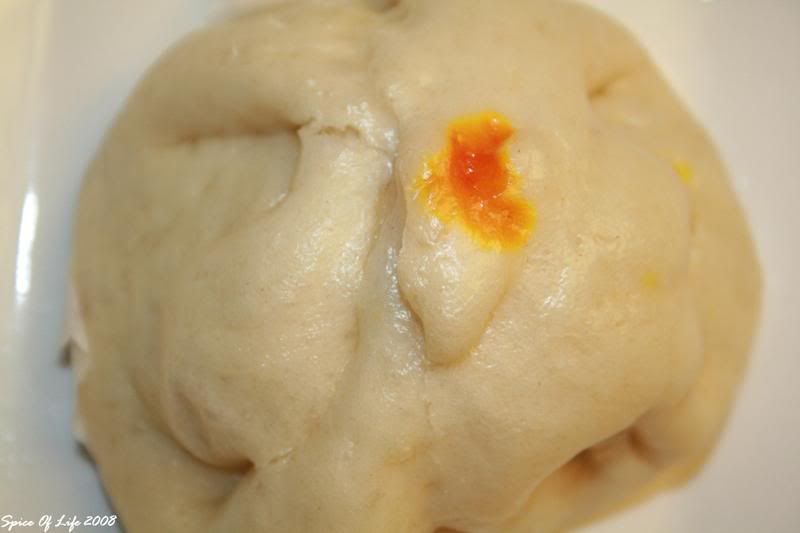
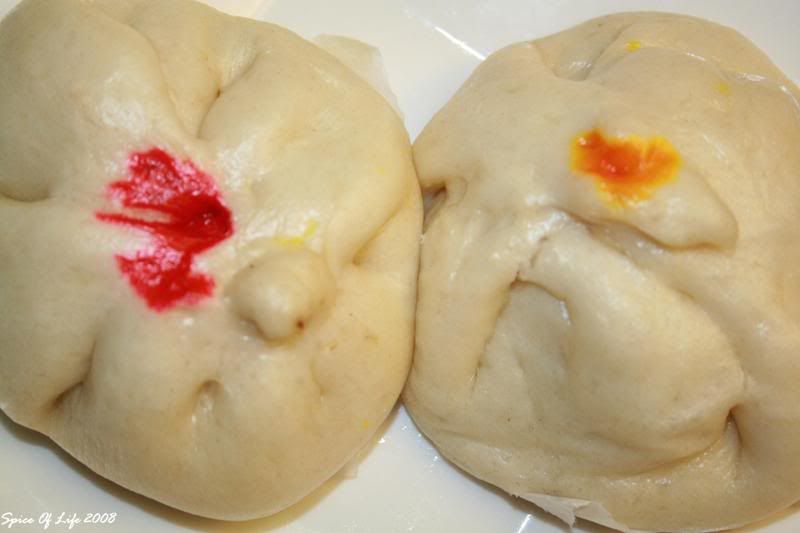
The food coloring on top is nothing but for me to identify the filling within. Here, the yellow is for the meatballs, and red is for the chicken.

Hmmn.. I'm glad I took the time make this. Even my husband enjoyed it. Hope you will too.
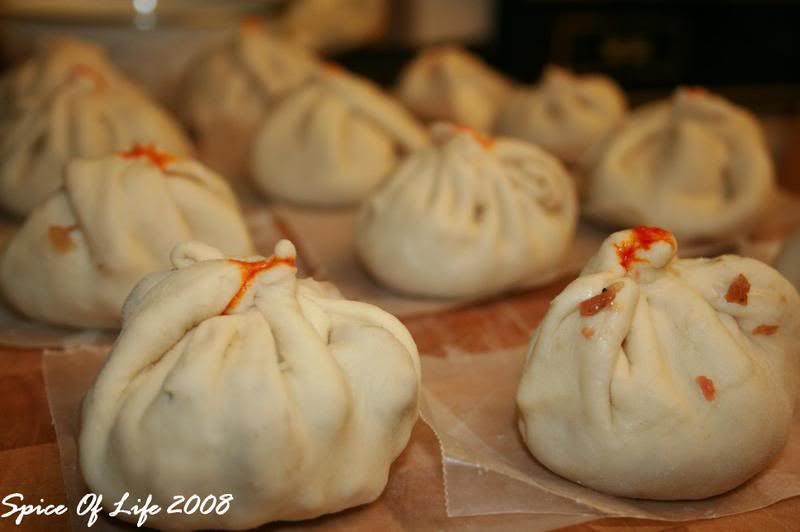
Siopao ready for steaming

SioPao

Dough:
1 cup warm water (about 100-110 degrees F)
3 tbsps sugar
1 package dry yeast (about 2-1/4 tsps)
3-1/4 cups all-purpose flour
3 tbsps canola oil
1/4 tsp salt
1-1/2 tsp baking powder
wax paper, cut into 2"x2" squares (about 12-20 pcs, depending on size of dough ball)

1. Combine warm water, sugar and yeast in a large bowl; let stand 5 minutes or until bubbly. DO NOT stir.
2. Spoon flour into the measuring cup and level with a knife. Add flour, oil and 1/4 tsp salt into yeast mixture. Mix well until soft dough forms.
3. Turn dough out into a floured surface. Knead until dough becomes smooth and elastic (about 10 minutes). Form into a ball.
4. Lightly oil/coat with cooking spray a large bowl. Place dough in the bowl, turning to coat top.
5. Cover with a clean, damp kitchen towel and let dough rise in a warm place (about 85 degrees F), for 2 hrs or until doubled in size. (Gently press two fingers into dough. If identation remains, dough has risen enough.)
6. Punch dough down; let rest 5 minutes. Turn dough out onto a clean surface; knead in baking powder. Let dough rest for 5 minutes.
7. Divide dough into two equal portions. Form one portion into a 10-inch log, and then cut into 5 equal pieces. Form each piece into a ball. Working with one dough ball at a time roll ball into a 4-5 inch circle. Make sure to cover remaining dough to keep them from drying.
8. Place about 1/4 cup of filling in the center of dough circle. Bring up sides to cover filling and meet on top.
9. Pinch and seal closed with a twist. Repeat procedure with rest of the dough.

Meatball Filling:
1 lb ground pork*
1 onion, finely chopped
1 tsp garlic, minced
1 med carrot, grated
3/4 tsp salt
1/2 tsp black pepper, freshly ground
2 eggs, beaten slightly
6 eggs, hard boiled, cooled and quartered

1. In a bowl, combine all ingredients except the ground meat and hardboiled eggs.
2. When mixed well, add ground pork to mixture. Mix by hand, only until all ingredients are thoroughly incorporated. Do not over work the meat.
3. Place about 1/4-cup of meat filling in the center of dough circle. Put quarter of the hard-boiled egg on top of the meat.
4. Proceed with #8 and #9 above.
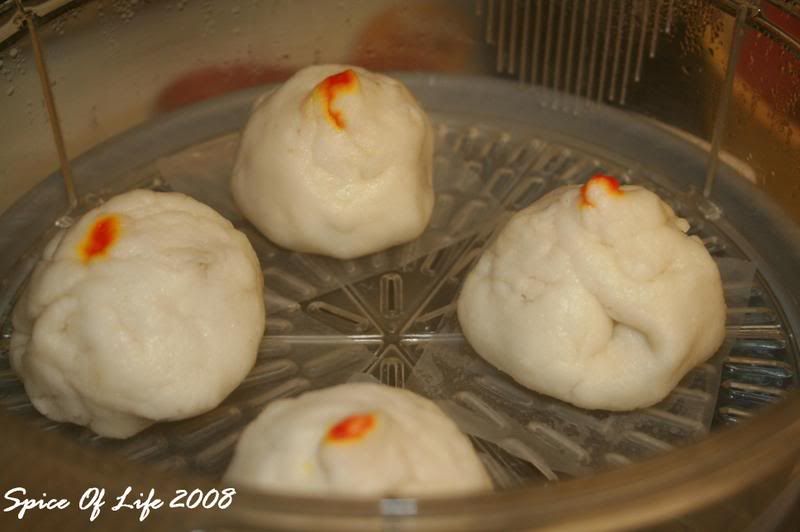
Siopao in the steamer

Chicken Filling:
1 lb chicken breast, boneless & skinless*
1/2 tsp five-spice powder
1 c green onions, thinly sliced
3 tbsps hoisin sauce
2 tbsps rice vinegar
1 tbsp soy sauce
1-1/2 tsp honey
1 tsp fresh ginger, minced
1 tsp garlic, minced
pinch of salt (be careful as soy sauce is already salty)
2 tbsps vegetable oil

1. Place chicken breasts in a pot. Add enough water to cover. Add dash of salt and pepper. Bring to boil. when boiling, reduce heat and allow to simmer until chicken is tender. Remove from water and let chicken cool.
2. When chicken is cool enough to handle, take two forks and shred the chicken into strips. Set aside.
3. Heat oil in a skillet. Saute onion till tender, then add garlic. Then add the cooked, shredded chicken and the rest of the ingredients.
4. Stir to mix and simmer for 2 minutes, or until bubbly.
5. Remove from heat to cool.
6. When cooled, add 1/4 of chicken to the dough circle. Do #8 and #9 procedures above under Dough.

Steaming:

1. Arrange bun in your steamer, 1 inch apart. Place wax paper on the bottom of each bun, seam side down (with me, I prefer to have the seam up, as it looks prettier).
2.If you are doing 2 or more fillings, I suggest that you color top with a food coloring to identify the filling in your buns.
3. If you are using a 2-tier bamboo steamer, stack tiers and cover with lid.
4. Add water to a large skillet to a depth of 1 inch; bring to a boil over medium high heat. Place steamer in pan; steam for 15* minutes until dough is puffed and set. Cool 10 minutes before serving.

*NOTE:

For meatball filling, steam 25 minutes since the meat is not pre-cooked.
If you are doing both fillings like I did, reduce the amount of the filling to half. Or, double the amount of your dough. Also, I added a 1/4 tsp vinegar to the steaming water. Vinegar has a bleaching effect on the dough when steaming, so you'll get whiter buns. For a gluten-free version, you may substitute the all-purpose flour with rice flour.