Showing posts with label Asian. Show all posts

Monday, May 4, 2009

Puto Maya (Sweet, Sticky Rice), Sushi-Style

Photobucket

“Ohhh.,… it’s mango season again!”

The words came out from my mouth almost like a song when I saw some mangoes being sold in the grocery that I go to. Adding to my delight was the fact that the mangoes are the ones that taste and look like those that come from the Philippines. I don’t see them often in the local grocery stores; I get them from the Asian markets all the time. I believe they are from Mexico. Naturally, I grabbed a box before they ran out.

This is one of the reasons why I love spring. Mangoes.

Mangoes are probably my most favorite tropical fruit. If you ask me, this is one of the food items that I miss most from the Philippines. I am especially partial to the mangoes that come from the city where I was born/raised – Cebu (Guadalupe). Those mangoes are so sweet; it is a dessert in and of itself. No kidding!

Philippine mangoes have none of that fibrous / stringy stuff, which is characteristic of those green/reddish mangoes that abound here in South Florida. They are pure, sweet flesh and the best way to eat them is by hand—yeah, peel off the skin and bite into it just like you would an apple (except that you have to remember, mangoes have huge seeds in the middle - you don’t want to loose a tooth). It’s a bit messy, but it’s totally worth it.

Photobucket

Having these mangoes is so timely. April was a crazy month for me, reason why I was MIA from the blog scene. For some reason, the past month was jammed with a lot of activities that ran from birthdays, baby showers to church functions. In the midst of all the helter-skelter, I began longing for something comforting; something that reminds me of home --- and this breakfast trio just hits the spot: freshly cooked "puto maya" (sweet sticky rice cooked in coconut milk), with ripe, sweet, golden mangoes and finished off with a hot "sikwate" (hot chocolate/cocoa drink processed locally in the Philippines). What is more comforting than something you grew up with eating?

So with my precious mangoes at hand, I was ready to tackle making the puto maya. Normally, puto maya requires soaking the rice for at least 6 hours. I believe this process lessens the liquid (in this case, coconut milk) needed to cook the rice in, at the same time, shortening the cooking period. However, I didn't have the luxury, nor the patience to wait for 6 hrs, so I decided to do my own short-cut method, hoping that it will yield the same results - more or less. And it did, thank God.

Mr. J likes the puto with mangga (mangoes, in our dialect) as well. As a matter of fact, it was him who suggested that I make sushi rolls out of it. He goes, “why don’t you make it like sushi? Form the rice into sushi, roll the rice in brown sugar to make them look like those sushi with fish eggs, and then put slices of mangoes on top of it!” (But I discovered later on that the turbinado sugar which I used melts easily that it didn't look right, so I ended up just sprinkling the rice with sugar as you can see in the photos.)

A popular Filipino breakfast served the popular Japanese way? A Filipino-Japanese fusion of sorts. Cute idea, isn't it? Now why hadn't I thought of that before?

“Oh, that is brilliant, Honey!” was my excited response to him. Not only is it brilliant, but it sounds like really fun to do (and it really was). Hey, who says we can’t have fun with our food? .. Which reminds me, one of my favorite bloggers, La Tartine Gourmande, did something similar to this but using rice pudding. Mind you, my hubby hadn't seen her post, so he thinks that this was a very original idea. I didn't have the heart to break it to him, so, let's just keep it a secret....ok??? SHHH...

Photobucket

This puto-mango-hot chocolate trinity is my entry to this week's Lasang Pinoy Sundays - Shades of Spring and Summer . La.Pi.S is a weekly food thematic photography meme, Filipino style.

Also, I'm sharing this to Iska of Iskandals for her Bloggoversary. Congratulations, Iska and here's to many more prolific years of cooking, eating and blogging!

Puto Maya
2 cups glutinous rice (sweet, sticky rice)*
4 cups thick coconut milk
3-1/2 tsps salt
1 cup sugar (or less, depends on how sweet you like it to be)
2-pcs ginger root cut into approx. 1", washed and smashed

1. Rinse rice and place in a 2-qt pot.
2. Add coconut milk, cover and let it come to a boil. When boiling, add the rest of the ingredients. Stir.
3. Turn heat to a lower setting and let mixture simmer for about 15 minutes or until rice is done. (I had to test the rice every now and then).
4. When done, scoop out rice, discarding the ginger root.Wrap rice in clean banana leaf, if available, and steam for about 30 mins.
5. If not, mold into cups and sprinkle with brown sugar if desired. Best enjoyed when warm, served with ripe mangoes and sikwate (hot chocolate).

Sikwate (Hot Chocolate/Cocoa Drink)
2 cups water
4 or more pcs tablea (pure dried cacao)*
1/2 cup brown sugar (or more, depends on your taste)

1. Place water in a pot. Let it come to boil.
2. Add the tableas and whisk vigorously by hand until tableas have melted.
3. Add sugar. Adjust sweetness to taste.
4. Serve with puto maya, while hot.

*NOTE: Glutinous (sticky) rice are available at Asian markets. Tablea is a Philippine product, so you might need to find a Philippine specialty store. Otherwise, you may use unsweetened cocoa powder as substitute.

Saturday, June 21, 2008

Taste & CreateXI: Chicken Cooked In Yoghurt (Dum Ka Murgh Zafrani)

It's that time of the month again. Time for Taste & Create, a monthly blogging event where partipating bloggers are partnered off with one another; the partners browse each other's blog and then they each have to cook their recipe of choice from their partner's blog. Cool huh? This blog was authored and is hosted by Nicole of For The Love Of Food.

My partner this time is Swati of Chatkhor. She's from Bangalore, India and so naturally, all of her recipes are for Indian food. She is a vegetarian, but she's started to venture into cooking chicken for her non-veg hubby. I'd say that's love right there. I enjoyed reading her posts. I can tell she's a fun person, who enjoys cooking so much. And her personality is obviously reflected in her cooking too. Swati, it's a pleasure to be partnered with you.

Now, what to cook? Obviously, we are not vegetarians, but I do cook vegetarian dishes once in a while. There are a number of recipes that I want to try from the blog, but unfortunately, a lot of the the spices the recipe call for are something that I doubt I'd be able to get here in Miami, as I don't know of any Indian specialty store around here. I also don't know what to substitute them with...
So in the end, I decided to do the recipe that Swati herself suggested - dum ka murgh zafrani, or chicken slowly cooked in yoghurt (check out the recipe here)... Doesn't the Indian title alone intrigue you?

Looking at the recipe, I knew right away that it would be a very rich dish. What with all that butter, yoghurt, milk and cream required... whew! So I had to tweak the recipe, just to control the fat content just a little bit. First of all, I used a skinless, boneless chicken breast. We usually don't eat the chicken skin anyway so there's no point in having it in this dish. Also, instead of using 1 cup of clarified butter as called for, I decided to only use 2 tbsps of butter, mainly for flavor, and a couple tbsps of olive oil. For the milk, I opted to use 2% instead of the full cream milk. Also, the yoghurt I used was non-fat. I had to do all these because Mr. J is watching his cholesterol level, so this is important if I were to feed him this dish. And for the fresh cream, I substituted it with heavy whipping cream using only half of what's required. And I have to admit.. I cheated a little bit too. I chose to use canned, peeled and crushed tomato instead of pureeing one from scratch. Not only did I saved a fraction of time, but I've also got lesser dishes to wash this way. I thought that was smart of me, wasn't it?
:o)

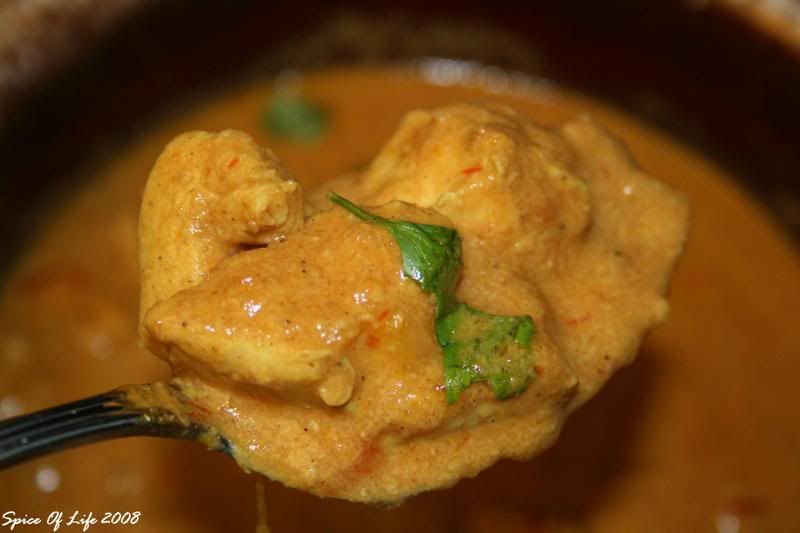
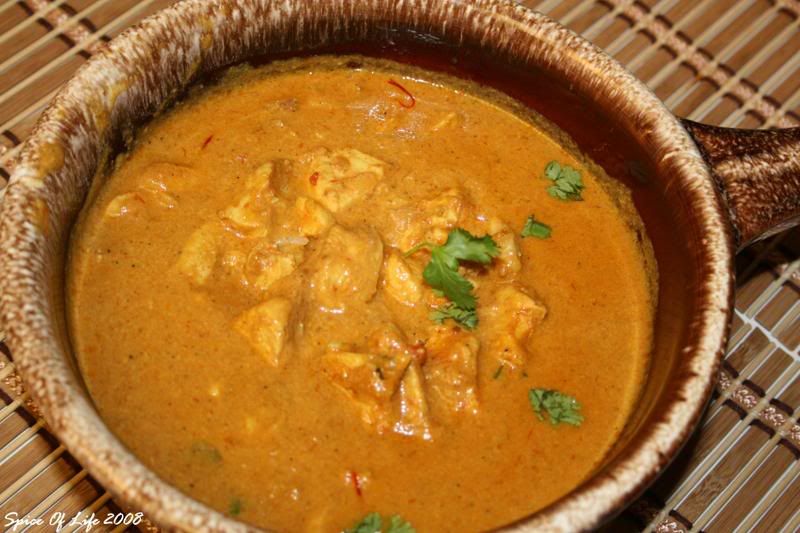
I don't think the changes I made affected the flavor of this dish at all. In my humble opinion, it's really all the spices that make this dish. The sauce still came out thick and creamy due to the addition of the almond paste and the pureed tomato. At first, I was kind of iffy about the almond paste. I thought almond paste is only for desserts. I never knew that it could be added on to savory dishes as well, but now I know better.. haha! The paste added a slight almond taste to the dish, but not overpowering. And it made this dish a bit sweeter as well, which is a nice balance to all the different spices going on in this food.


As it is only Mr. J and I at home, I decided to cut the recipe down into half. But even with half a recipe, it still made a lot, especially the sauce! But you know what, this food tastes better the next day, so I am not complaining.

Cooking this dish transported me back in time when I was hanging out with pals from New Delhi (India) and Katmandu (Nepal). Almost 10 yrs. ago, I was in a scholarship program in Germany, which was sponsored by the German government. I got close to my colleagues from India (there were 2 of them) and Nepal. The smell of this dish as it cooked made me remember those good ol' times when my friends would cook dinner, or at other times, when we would have Indian theme nights. We would go out to eat at Indian restaurants (in Germany), and watch Indian movies afterwards. Oh, I miss those fun times with them. I still communicate with these friends up to now, actually.

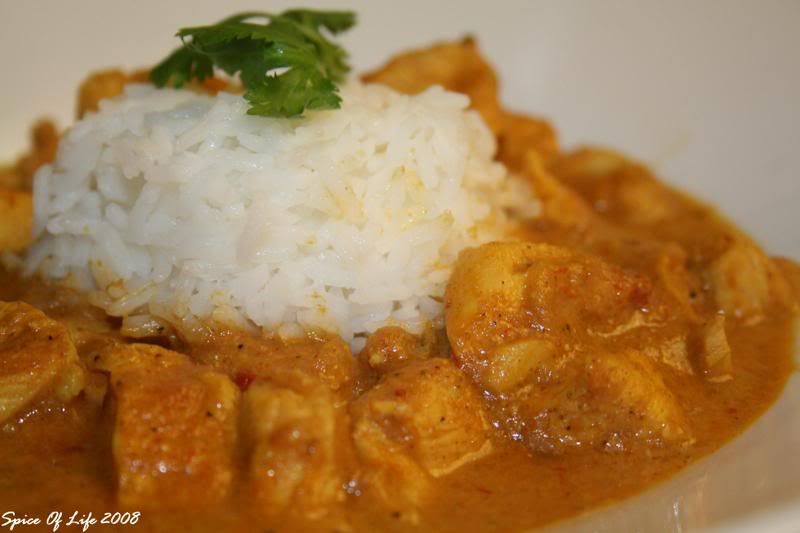
Anyways, before I get carried away too much..... This dish is similar to curry, except that there is no curry in it. It had all the spices that one would expect in an Indian dish. The chicken was creamy and dreamy and I served it with plain boiled jasmin rice garnished with cilantro... Yum! My husband, who thought it was spicy, was surprised because the dish is milder than he had expected and slightly sweet. He actually liked it...Life is good.... Thanks, Swati, for a great recipe!

Saturday, June 7, 2008

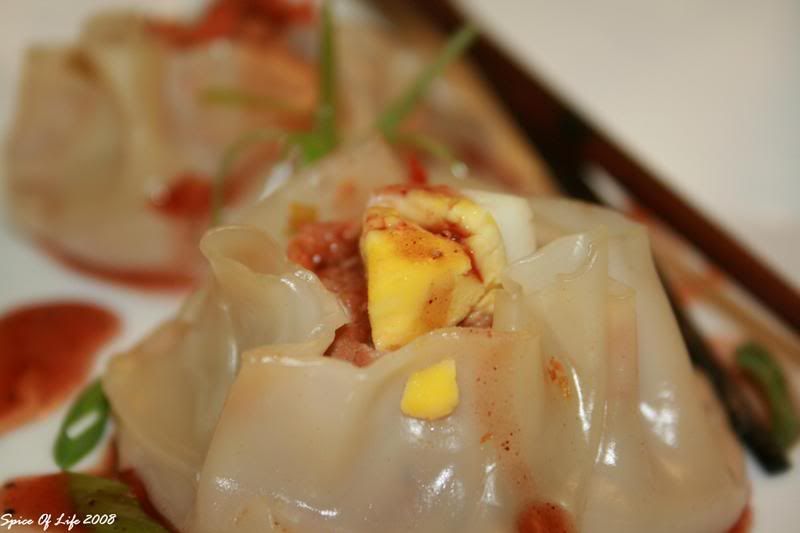
Steamed Pork Wonton Dumplings (SioMai)


SioMai (shoo-mai) commonly known as steamed dumplings, is one of the dishes brought to the Philippines by the Chinese immigrant, Ma Mon Luk. I told you about his inspiring story two posts ago. If you didn't get to read it, check it out here.

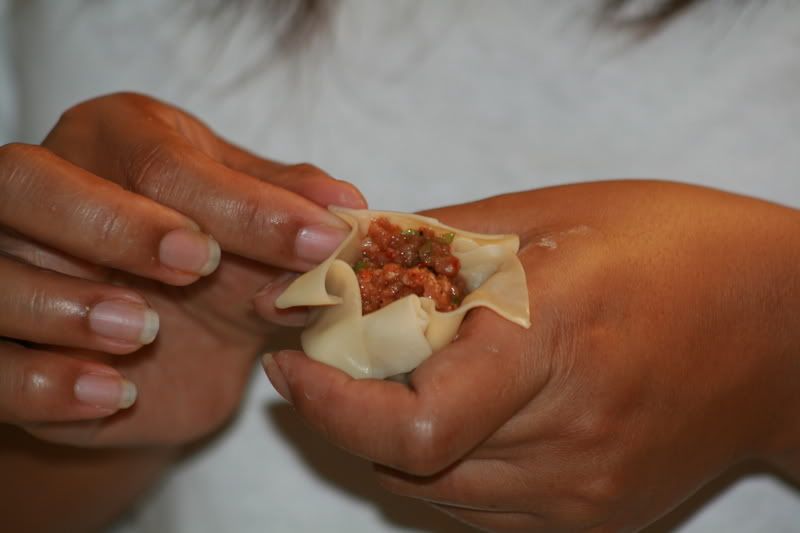
This food is a dimsum staple in China or Hongkong. What I like about this dish is the fact that it is steamed. Steaming leaves the ingredients' essential flavors and textures intact. Also, it is a healthier way to cook, yes?. It does take lot of time to prepare, so as a warning, do this way ahead of time when your tummy has not began churning yet. The actual steaming of these wonderful little bites don't take time, it's the stuffing and wonton wrapping action that does require a bit of patience.

As you know, Asian cuisine is characterized by a lot of chopping, dicing, wrapping or rolling. Really, it's the preparation part that is more time consuming than the actual cooking in itself. But hey,if you love Asian food, then it's going to be worth your effort.


You can serve these dumplings as appetizers, but my hubby and I often eat these for dinner, with a simple noodle soup perhaps. These yummy little things are light but filling.

The recipe below really is for you to learn the method more than anything else. These dumplings are so versatile that you can change up anything from the meat, to the vegetables and the topping.

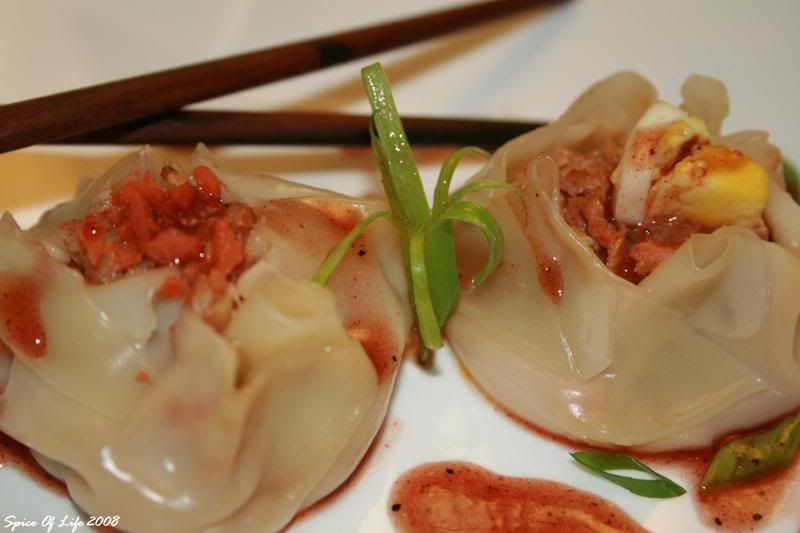
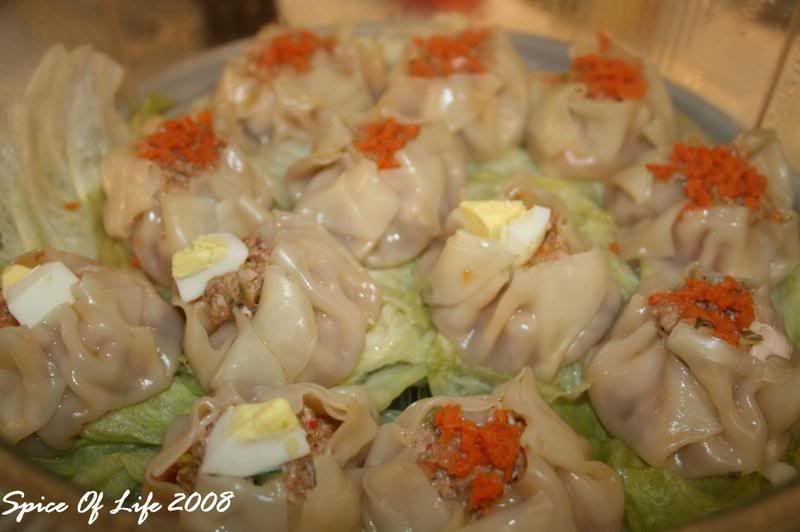
Here, I used shredded carrots and boiled eggs as toppings. But you can also use shrimps, mushrooms, crabmeat, chopped scallions or quail eggs, or anything that might strike your fancy.

You can eat these with or without the dipping. But I love dips and sauces, so I chose to make a simple dip to go with my dumplings. There are many options to use as a dipping sauce. There is the bottled Thai/Chinese sweet chili sauce, or just the Hoisin sauce. What I did this time is a mixture of Hoisin sauce thinned out by a bit of lite soy sauce, and I added a bit of the garlic-chili paste for a little kick. If you want your sauce to be a little bit sweeter, you can either add more Hoisin, or add just a touch of honey.

Steamed Pork Wonton Dumplings
1 pound ground pork
1/2 cup carrots, shredded
1 (5 oz) can water chestnuts, strained
1/4 cup scallions, coarsely chopped
2 cloves garlic
1 tbsp fresh ginger, coarsely chopped (about 1-inch size)
1 tablespoon sesame oil
1 egg, beaten
2 tbsp soy sauce
3 tablespoon oyster sauce
1 tbsp chili-garlic sauce (optional)
1 (16-ounce) pack wonton wrappers
Savoy or Napa cabbage for lining *

1. Throw in the food processor the carrots, garlic, ginger, chestnuts. Pulse a few times until vegetables are finely minced. You can also do the mincing by hand. The important thing is that thye veggies are minced finely.
2. Pour the processed vegetables in to a large bowl. Add the scallions, sesame oil, egg, soy sauce, oyster sauce and chili sauce (if using). Mix well.
3. Add the ground pork to the bowl and mix thoroughly, making sure that the spices and veggies are thoroughly incorporated. Do not overmix meat.

4. Working with one wonton wrapper at a time, (cover the rest with a damp paper towel to prevent from drying), spoon about 1 tsp meat mixture to the center of each wrapper. Moisten the edges with water.
5. Gather up and crip the edges of the wrapper around the filling; lightly squeeze to adhere to filling, leaving top open. Place your topping on top and gently press into the filling. Place dumpling on a baking sheet; cover loosely with damp towel. Repeat procedure.
6.Line your steamer with the cabbage leaves. Arrange dumpling over the leaves, 1 inch apart
7. If using a bamboo steamer, add water to skillet,about 1 inch deep; bring water to boil. Place steamer in pan and steam dumpling for 15 minutes or until done.
8. Remove dumplings from steamer. Serve warm with the dipping sauce. Discard cabbage.

*NOTE: Lining the steamer with cabbage leaves ensures the dumpling won't stick to the bottom of the steamer.


Friday, May 23, 2008

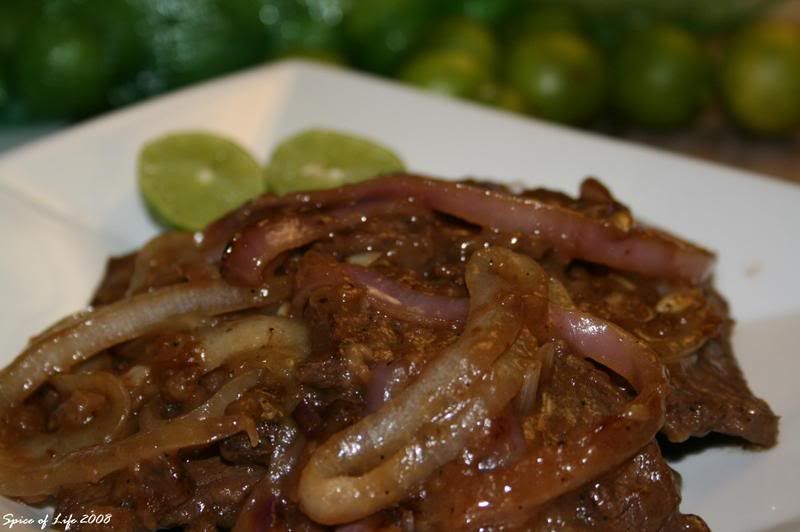
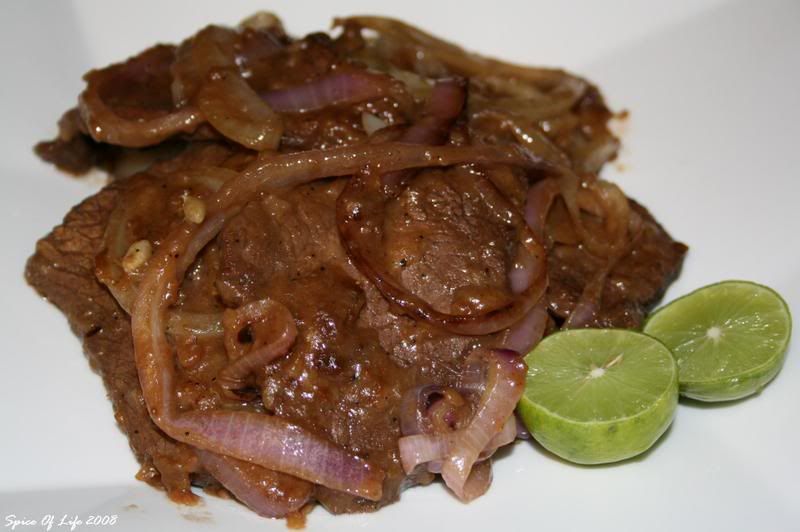
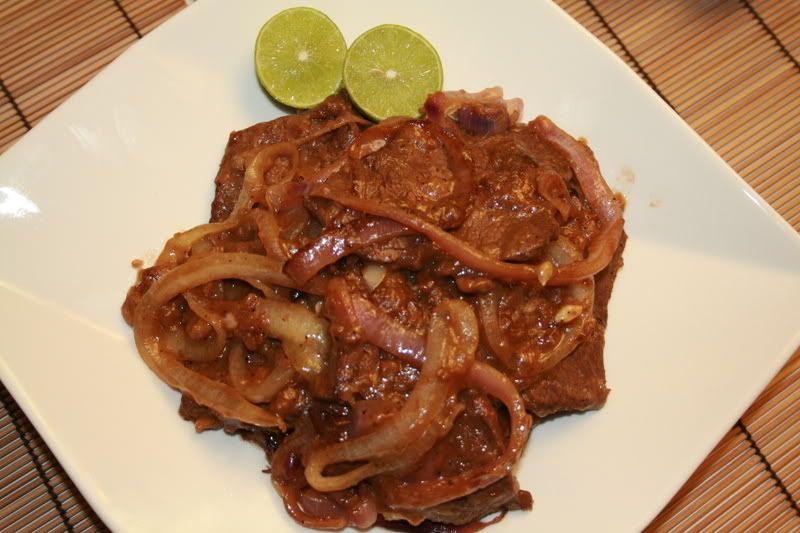
Pinoy Bistek (Filipino-Style Beefsteak)

Photobucket
Filipinos in general, like the rest of the Asian countries, are not heavy meat eaters. Most of our dishes are prepared with lots of vegetables or noodles in them. Or, when we eat meat, we eat a matchbox-sized piece with lots of rice. (Yes, we love rice. We eat it for breakfast, lunch and dinner, and yet, most Filipinos are petite. So rice really cannot make one fat!)

I can only attribute the way we eat to the Philippines being a third world country, that is, poor. Majority of the people cannot afford to have meat dishes on a daily basis. For a famiy of seven (the average size of a Filipino family), the meals can become real costly. Thus rice, vegetables and noodles are thrown in to extend the dishes and make a big meal out of a little piece of meat.


As for my family, this dish was one of our Sunday lunch tradition. This happens to be one of my Dad's favorite, so my Mom prepares this for him. This is called "bistek", or the Filipino-style beef steak. It is not like the steak that you would think it to be here in the U.S. They're smaller pieces of beef sliced thinly and marinated in "kalamansi" (key lime), soysauce, garlic, salt and pepper. Some say, "bistek or bistec" refers to the Hispanic style of cooking a dish with a sauce. This is most probably true, considering that our culture is heavily Hispanic-influenced.

I remember hating this dish when I was younger because I didn't like the pieces of the meat that get stuck in between my teeth. I would be crying by the end of our dinner. But thankfully, this is not the case anymore. In fact, this has become one of my favorite Filipino comfort food.

Now that my Mom has passed on to be with the Lord, this dish brings back loving memories of her and my family as I was growing up.
Photobucket

Photobucket

Pinoy Bistek
1 lb. beef (round, sirloin or tenderloin), sliced 1/4-inch thick
6 tbsp. of kalamansi (key lime) juice
1/2 c. dark soy sauce
3 tsp. garlic, minced
black pepper, freshly ground
2 large onions, sliced into rings (I used red onions)
2 tbsp vegetable cooking oil, or more if needed
flour, for dredging

1. Slice the beef. Take a piece of plastic wrap and cover the meat. Pound the meat mallet or a heavy skillet. Do this carefully so as not to tear the meat. (This is to ensure that the meat would be tender, but you can skip this step).

2. In a bowl, mix the next 4 ingredients (from the kalamansi juice thru pepper). Mix well and let the meat marinate in it for at least 30 minutes. (My opinion, the longer the marinating time, the better the meat tastes)

3. When ready, bring a heavy skillet up to temperature. Add the vegetable oil. Fry the onions lightly, just until tender. Remove from skillet and keep warm.

4. Take the meat out but reserve the marinade. Dredge the meat lightly with flour, carefully shaking off the excess.

5. Add oil to skillet and heat until smoking. Pan-fry the meat until brown (in batches if you have to). When the beef is done, add the marinade into to the skillet and let it boil for a minute or two. Then add the beef back into the skillet. Mix until all pieces are coated well with the sauce. Add the fried onions. Simmer for another minute or two.

6. Serve immediately with white rice. Enjoy.

Friday, May 9, 2008

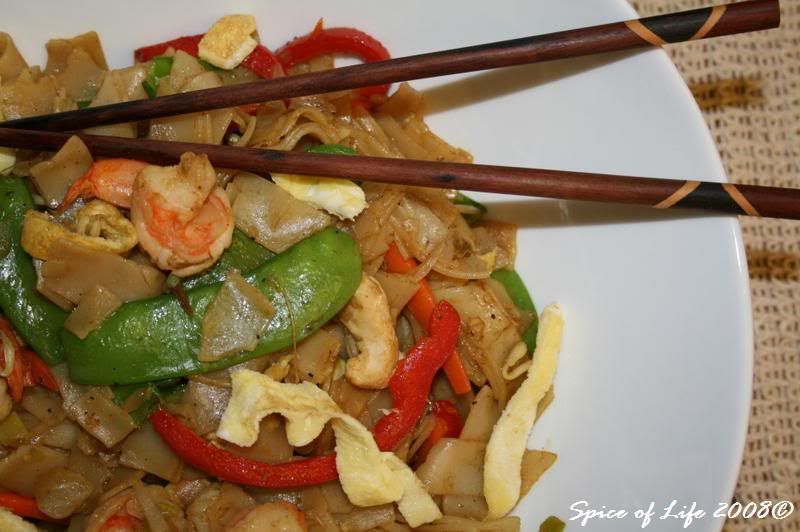
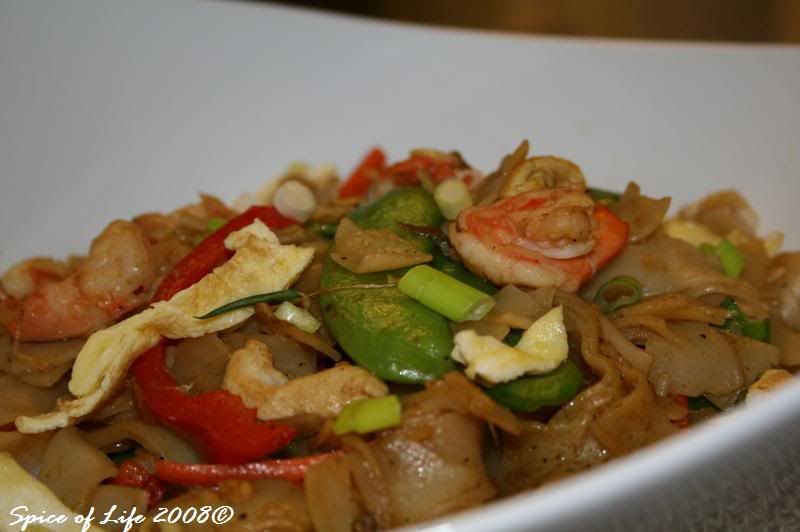
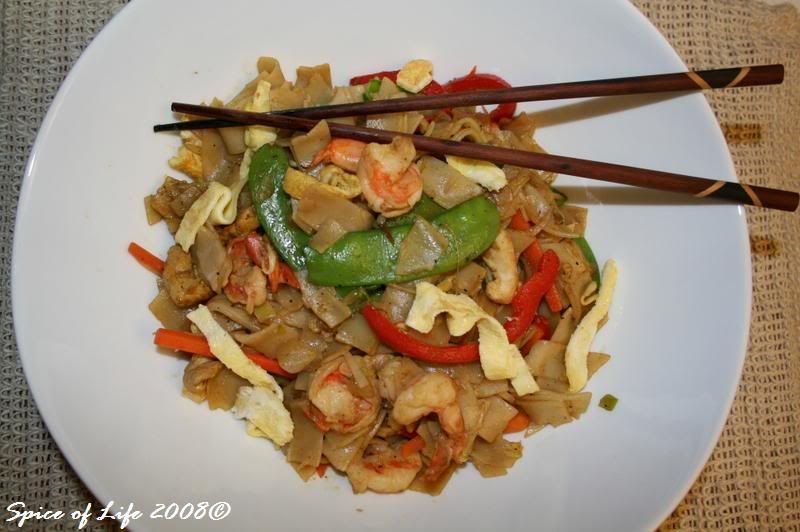
Singapore Style Noodles

Photobucket
Well, it seems like I've been giving you a tour in Far East with my Asian-themed dinners recently. Believe me, this wasn't planned at all. It just happened. What can I say, I'm originally from the Philippines, therefore, I'm Asian by race.

Growing up in the Philippines has naturally exposed me to the varied kinds of Asian noodles, mostly Chinese. One of the earliest settlers in the Philippines are the Chinese, and so you will notice that there's a huge population of Chinese-Filipinos in our country. Consequently, Chinese cooking has made a huge impact in our cuisine. I would say that the food and spices are among the best legacies of the early Chinese settlers in my homeland.

Anyway, this time I am doing the Singapore Mai Fun or the Singapore rice noodles. (I've been to Singapore three times, and I believe this is one of the cleaner, if not the cleanest country in the whole wide world). This noodle is unique, in that it calls for curry powder. If you love curry like I do, then this is for you.

This dish is pretty healthy too.Traditionally, this is done with skinny rice noodles, but I have the flat/wider kind in my pantry so I used that instead. But if you want to try this recipe, I suggest you use the skinny ones. That way, your dish would look more like the traditional one.
Photobucket

Singapore Mai Fun
1 (6 oz) package skinny rice noodle ( I used the flat/thicker one as I said above)
1/2 cup chicken broth*
3 tbsp low sodium soy sauce*
1 tsp sugar
1/2 tsp salt
Cooking spray
1 tbsp peanut oil*, divided
1 large egg*, lightly beaten
1/2 cup red bell pepper, sliced into strips
1 tbsp grated peeled fresh ginger
1/4 tsp fresh ginger, peeled and grated
1/4 tsp crushed red pepper
3 garlic cloves, minced
1-1/5 lbs skinless, boneless chicken breast thinly sliced
1-1/5 lbs med shrimp, peeled and deveined
1 cup snow peas
1 cup green onions, sliced into 1-inch
Photobucket

1. Cook rice noodles according to package directions. Omit salt and oil. Drain.
2. Combine broth, soy sauce, sugar and salt; stir until sugar dissolves.
3. Heat a large non-stick skillet (or Wok, if you have) over medium high heat; coat pan with cooking spray. Add 1 tsp oil. Add egg; stir fry 30 seconds or until soft scrambled, stirring constantly. Remove from pan.
4. Wipe clean the skillet. Heat the remaining 2 tsps oil in pan over medium high heat. Add bell pepper strips, snow peas, garlic and crushed red bell pepper. Stir fry for 15 seconds.
5. Add chicken and stir fry for 2 minutes, or until done.
6. Add curry and shrimp; stir fry for another 2- minutes.
7. Stir in noodles, broth mixture and egg. Cook 1 minute or until thoroughly heated. Sprinkle with green onions and serve.

*NOTES: You may certainly use fat-free, less sodium chicken broth if you prefer. Reversely, you can use regular soy sauce instead of the low-sodium, but I suggest that you omit adding the salt. As for the egg, I used egg-beaters (egg substitute) in mine and it worked out well.


Thursday, May 8, 2008

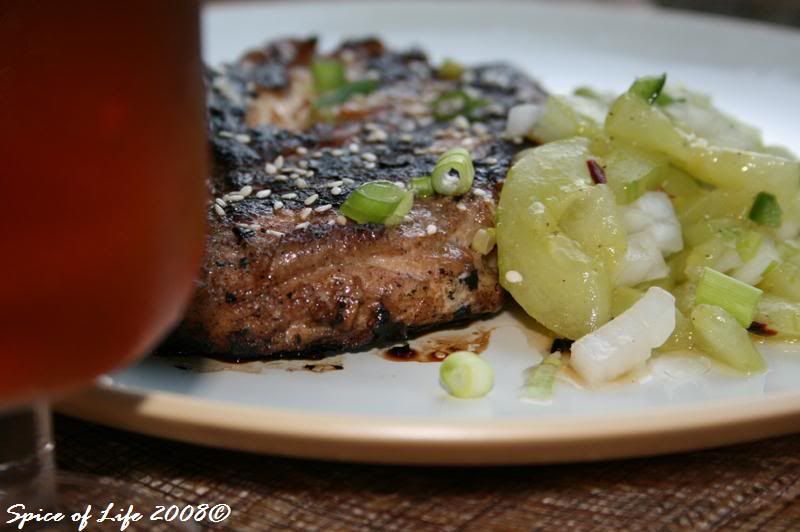
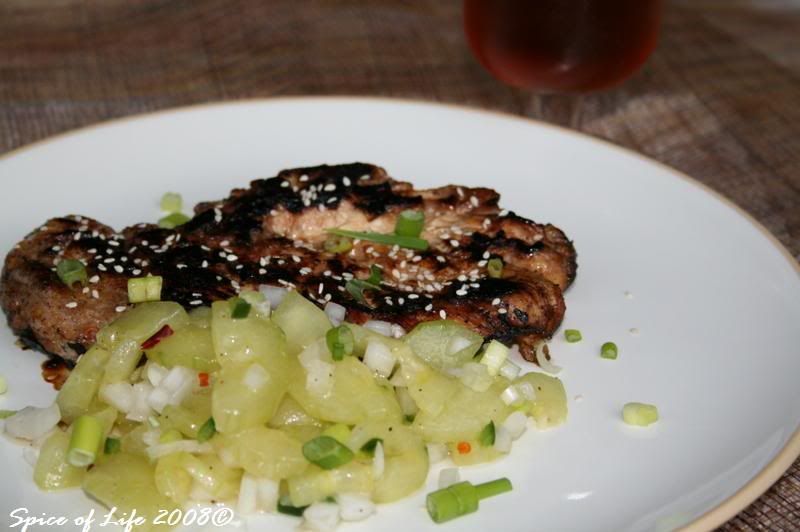
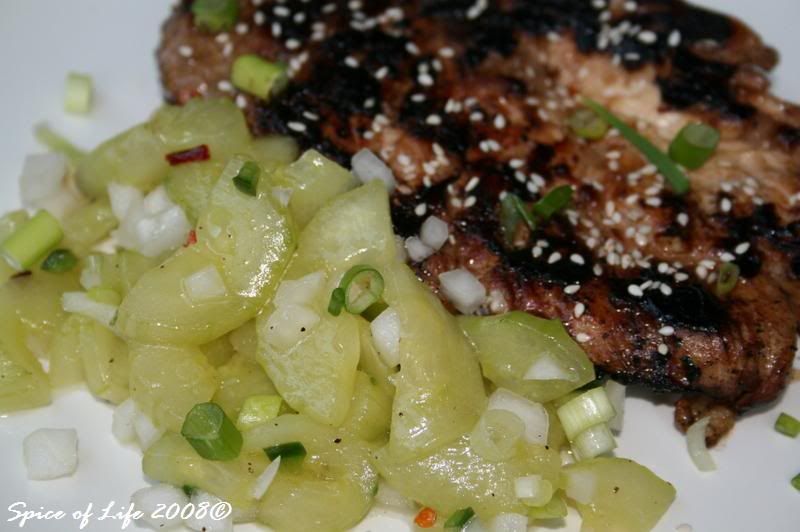
Seoul-ful Chicken With Minted Cucumber

Photobucket
I am always interested in educating my palate, that's why I was eager to try this recipe that I happen to find when scanning an issue of Cooking Light magazine - chicken and cucumber done Korean style.

Kimchi is pretty much all I know about Korean food, and I'm sure that there's more to it than kimchi. It is one of the least familiar cuisine to me among the Asian countries, so I'd be glad to get to know a bit more of Korean cooking.

So here's something that resembles that of a korean dish (I hope). The chicken calls for ingredients common in Asian cooking, of course. As for the cucumber salad, it's some kind of a kimchi-type accompaniment, very similar to your cucumber salad with vinaigrette but with a slight difference in the prepartion. Find out how...

Photobucket

Cucumbers
1 English cucumber, peeled, halved lengthwise, and thinly sliced (about 2-1/2 cups)
1/4 tsp salt
1/4 tsp shallots
2 tbsp fresh mint, chopped
1 tbsp season rice vinegar
1 tbsp honey
1 tsp dark sesame oil
1/4 tsp ground red pepper
1 serrano chile, seeded and minced

1. Place cucumber slices in colander; sprinkle with salt, tossing well. Drain 1 hour.
2. Place cucumber slices on several layers of paper towels; cover with additional paper towels. Let stand 5 minutes, pressing down occasionally.
3. Combine cucumber, shallots, and next 6 ingrediets (thru chile) in a large bowl; toss gently. Cover and set aside.
Photobucket


Chicken
4 skinless, boneless chicken breast*, about 1-1/4 lbs
1/4 c soy sauce
2 tbsp dark sesame oil
1 tbsp fresh ginger, peeled and minced
1 tbsp honey
1/2 tsp freshly ground black pepper
3 garlic cloves, thinly sliced
1/4 c green onions, thinly sliced
4 tsp sesame seeds, toasted

1. Place the chicken between 2 sheets of heavy duty plastic wrap; pound to 1/2-inch thickness.
2. Combine soy sauce and the next 5 ingredients (thru garlic) in a large zip top plastic bag.
3. Add chicken to soy sauce mixture in a bag, seal. Marinate in refrigerator 30 minutes, turning bag occasionally.
4. Heat grill pan over medium high heat. Coat with cooking spray.
5. Remove chicken from the bag; discard marinade. Cook chicken for 6 minutes on each side or until done.
6. Serve chicken with 1/2 cup of cucumber; sprinkle salad with green onions, and chicken with sesame seeds.

NOTE: Recommended meat is chicken thigh (boneless,skinless), but we prefer the breast. You may certainly use chicken thigh if you want, which is actually a juicer and more tender meat.


Wednesday, April 9, 2008

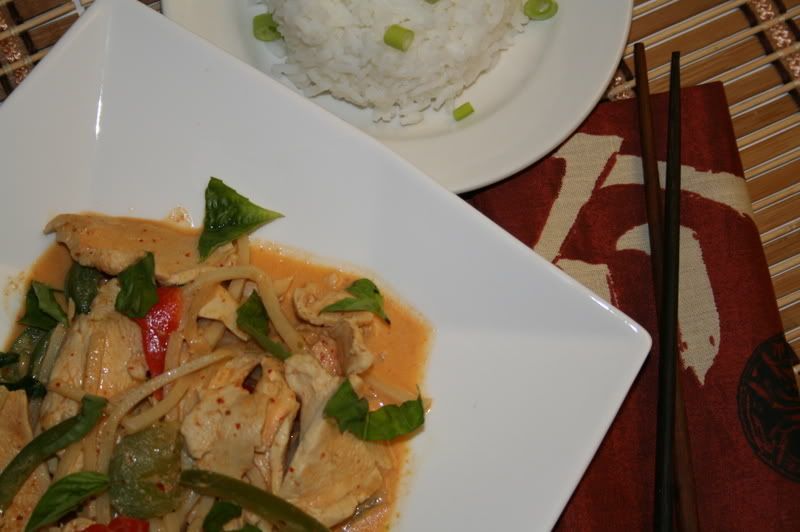
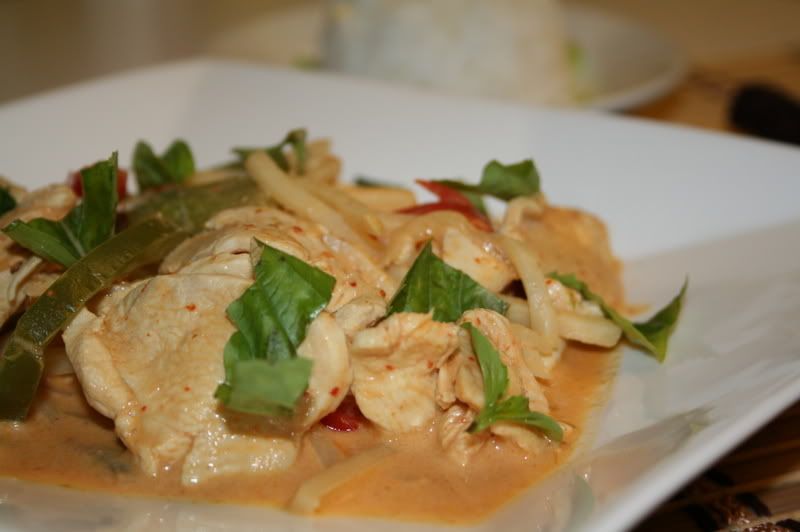
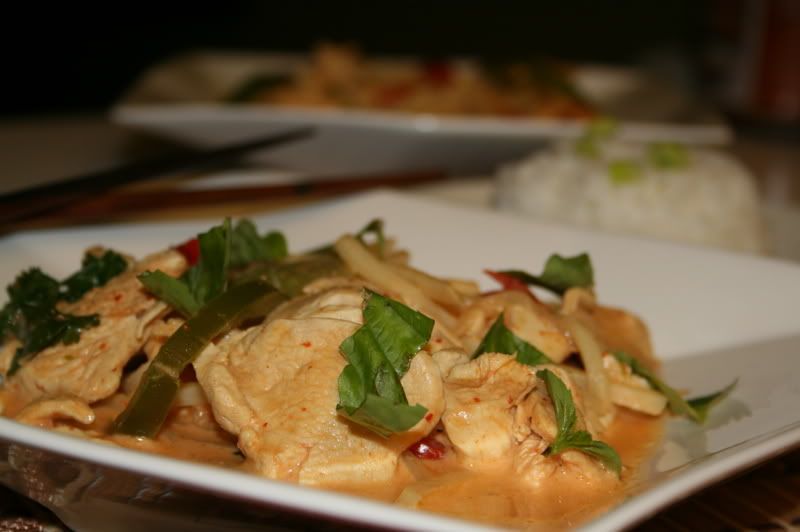
Red Curry With Chicken & Bamboo Shoots

Red, yellow or green. Nope, I'm not describing a flag, nor are these the latest color trends in fashion, but rather, they're the colors of an Asian spice: the curry.

Although curry originated from India, this spice is widely used among the East Asian as well as the South East Asian cuisine. Its color tells you how spicy it is - with red being the most spicy (from red chilies), green-medium (from green chilies) and yellow, mild (from cumin and turmeric). I like 'em all but prefer having them cooked Thai-style, which means, with coconut milk. Combining the curry with coconut milk tends to be more aromatic, it seems to me.

Photobucket

My husband and I love red curry. There's a small Thai-Chinese restaurant we go to when we're craving for Thai food. It's a hole-in-the wall place, but man, their chicken with red curry is the best. I've been craving for red-curry chicken these past days, but this time, I resolved to make it myself. And boy did I enjoy this dish. It's even better the next day!
Photobucket

Red Curry with Chicken & Bamboo Shoots
(recipe adapted from templeofthai.com)

1.5 lb boneless chicken breast
2 tbsp vegetable oil
3 pcs garlic cloves, minced
1/2 medium onion, sliced
2 tsp green onion, chopped
1 can (16 oz) bamboo shoots, sliced
1-2 tbsp red curry paste
1 can coconut milk
1/2 cup basil leaves, torn (if you find Thai sweet basil, much better)
2 tbsp fish sauce

1/4 tsp sea salt
1 1/2 tsp sugar

2 tsps lime zest (approx 1 lime, or 3-4 kaffir lime leaves)
1/4 cup red bell pepper, sliced
1/4 cup green bell pepper, sliced
Cilantro & basil, for ganish

Photobucket

1. Heat oil in pan. When hot, saute onion 'til translucent. Add garlic.
2. Then add chicken pieces. Saute till chicken have turned white.
3. Add red curry paste and stir till curry is well incorporated and oil comes to surface.
4. Then add half of the coconut milk, fish sauce, sugar,bamboo shoots. Go easy on the salt, as remember, the fish sauce is already salty.
5. Then, let the chicken simmer in coconut milk for about 3-4 minutes or until chicken is thoroughly cooked.
6. Then add the rest of the ingredients: red & green peppers, green onions,the rest of the coconut milk. If using kaffir lime leaves, add them at this point. Adjust seasoning. Simmer for 1 minute more.
7. Before serving, garnish with basil leaves and/or cilantro.
8. Serve with steamed rice.


***NOTE: 2 tbsps red curry paste might be too much, so I suggest you start by adding 1 tbsp first. I got carried away and added 2-1/2 tbsps. My hubby found it a bit too spicy. He added a more sugar to balance the heat.

Monday, April 7, 2008

Giniling, a.k.a. Picadillo

Filipino lesson: Giniling (ghee-nee-ling) - refers to anything that's ground; also applies to a dish made from ground meat

Philippine cuisine is very much like a Filipino himself: a result of a mixture of different cultures. There's the influence from the Chinese, Malay, Arab and Indonesian with whom the native Filipinos traded with during the pre-Hispanic era in our country. This economic exchange introduced to our people stuff such as noodles, cumin, soy sauce, fish sauce and others, to name a few.

The discovery of the Philippines in 1521 by a Portuguese explorer Fernando Magallanes (whose service was employed by King Philip of Spain, thus the name "Philip"-pines) marked the beginning of the Spanish occupation in our country lasting for more than 300 years. And it was during this period that our culture, and yes, including our palates, was transformed into what it is now: a fusion of the East and the West, an Asian-Hispanic blend.

This dish that I am sharing with you today is just one of the many East-West combination of flavors. "Giniling" is similar to the Hispanic/Latin American dish called “Picadillo” in that it calls for tomato paste, but different in that it has soy sauce in it too. I made it the way I remember my mother used to do it when I was growing up, but the wine and olives are a new twist, inspired by another blogger, Susan of stickygooeycreamychewy.blogspot.com. Thanks, Susan!

Giniling
1-1/2 lb ground beef (or pork), I used sirloin for lesser fat
3 tbsps olive oil
1 large onion, diced
3 big cloves of garlic, minced
1-1/2 c potatoes, cubed (approx 1 large piece)
1/2 c red bell pepper
1/2 c carrots, diced
1/4 c pimiento stuffed olives
1 handful green peas, thawed
2-3 tbsp tomato paste
2-3 tbsp soy sauce
1/2 c white wine
1 tbsp apple cider vinegar
2 bay leaves (3, if small)
1 tsp smoked paprika
1 tsp ground cumin
1 tsp dried oregano
1 tsp ground cinnamon
1 tsp sugar
Salt and pepper, to taste
Parsely, for garnish

1. Heat your oil in a deep skillet. When hot, sauté onions till translucent. Then add garlic.
2. Sauté for a minute and then add the meat. Cook meat till its done (when brown).
3. Add the potatoes and the carrots. Season with a bit of salt and pepper. Be
careful with your salt since you’ll be adding soy sauce later on.
4. Cover the meat mixture and let it simmer for just 2-3 minutes.
5. Then add the wine. Let is simmer for another 3 minutes or until the wine has
reduced to half its amount.
6. Then add the vinegar and the next 9 ingredients (thru sugar).
7. Cover and simmer until the potatoes are cooked.
8. When potatoes are done, adjust seasoning (add more according to your taste).
9. Add the red bell peppers and the peas just before turning off the heat.
10. Serve with steamed white rice, or yellow rice. Garnish with chopped
parsely/cilantro.

*Note: By all means add more of the liquids (wine, vinegar and soy sauce) in step #6 if you find the meat mixture dry/ or if you just want more sauce. You will need to adjust seasoning accordingly as well.

Monday, March 24, 2008

Pork And Squash Stirfry

In the Philippines, one of my favorite lunch time eats is a Chinese dish called "steamed rice". Uh-oh. It's not just plain rice as the name suggests. It is rice, yes, but with toppings - and you can get it with either pork, chicken or shrimp topping. Not one chinese restaurant here in the U.S. serve this dish (I didn't find it so far), so I always make it a point to have it whenever I am back in my beloved motherland.

This dish that I cooked for dinner tonight reminds me of steamed rice, as it is a very good rice topping. In fact, I cannot imagine eating this dish with something else other than plain white steamed rice.
Pork And Squash Stirfry:
1 (2 lb) butternut squash, peeled and cut into 1 in. cubes
2 tbsp peanut oil
2 tbsp coarsely grated orange rind
1 tbsp minced peeled fresh ginger
½ tsp crushed red peppers
1 (3-in.) cinnamon stick, broken
1-1/4 lb pork tenderloin, trimmed and cut into 2-in. strips
2 tbsp sugar
3 tbsp low-sodium soy sauce
2 tbsp Chinese black vinegar
2 tbsp red wine vinegar
1 tsp cornstarch
¼ tsp salt
1 c chopped green onions
Directions:
1. Place squash in a large microwave safe bowl. Add water to a depth of 1 inch. Cover with plastic wrap, vent. Microwave at HIGH 8 minutes or so until tender. Drain and set aside.
2. Heat oil in a large nonstick skillet over medium heat. Add rind, ginger, red pepper and cinnamon stick pieces. Cook 1 minute, stirring constantly. Remove and discard cinnamon stick pieces.
3. Increase heat to medium-high. Add pork to pan, and sauté 4 mins or until browned. Combine sugar and next 5 ingredients (thru salt), stirring with a whisk. Add sugar mixture to pan; cook 2 minutes or until sauce is slightly thickened, stirring constantly.
4. Add squash, toss to coat. Stir in green onions.
As always, I tweaked the recipe to suit my preferences and budget. First, I used balsamic vinegar in place of the Chinese black vinegar (chinese black vinegar is sweet and has a smokey taste). Or you may also use Worcesteshire sauce instead. Second, I used regular soy sauce but did not add any more salt. Third, I threw in some diced red bell pepper for color and taste. Fourth, instead of the peanut oil, I used a mixture of walnut oil and sesame oil. It's what I have in my pantry. And lastly, for the squash, I blanched it with boiling water for a couple of minutes. I prefer cooking on my stove top rather than using the microwave.

This recipe was adapted from the Cooking Light magazine.

Tuesday, March 11, 2008

Chocolate Ravioli-Wontons

I have yet to meet a person who doesn't like Nutella. And if I do, I would certainly tell that person that he/she is not normal! What's not to love about it? This gooey, creamy, rich hazelnut chocolate spread is just addicting.

But Nutella is more than just a spread for bread (hmmnn, good title). I've learned that you can use it in various ways for desserts. Such as this one I'm sharing with you today.

If you've read my previous posts, you'd know that we've got friends who are leaving for South Africa, the Logans. Well, our other friends, Marcy and Heredes, made dinner for them on Monday night. Marcy made a very tasty lasagana and salad (wish I had photos of her lasagna, sorry). And Marcy requested that I make this for dessert. How could I say NO?

And so we had this chocolate-filled ravioli-wontons for dessert. It's a perfect Asian-Italian fusion. Thanks again to my my fave Chef, Giada de Laurentiis for the recipe.


I'm telling you, if you've got a chocolate craving and you just don't want to eat Nutella out from the container, this would be a good substitute. Very easy, very simple. The crunchy wontons with the creamy chocolate that oozes out as you bite into it just hits the spot! The only thing is that when frying, this requires your full attention as the wontons get done ever so quickly!


The sugared mint leaves is just a garnish (as suggested in the recipe), but the wontons are perfectly fine eaten without the herb. Enjoy!


Fried Raviolis With Choco-Hazelnut Filling:
16 wonton wrappers
1 egg, beaten to blend
1 cup chocolate-hazelnut spread (recommended: Nutella)
Vegetable oil, for frying
16 fresh mint leaves
Nonstick vegetable oil spray
Granulated sugar, for dredging
Powdered sugar, for dusting

1. Brush the edges of the wonton wrapper lightly with egg. Cover the rest of your wontons in a damp towel to prevent them from drying out.
2. Spoon 1 tablespoon of chocolate-hazelnut spread into the center of the wrapper. Fold the wrapper diagonally in half over the filling and press the edges of the wrapper to seal. Repeat with the remaining wonton wrappers.
3. Add enough oil to a heavy large frying pan to reach a depth of 2 inches. Heat the oil over medium heat to 350 degrees F.
4. Working in batches, carefully add the ravioli to the hot oil and cook until they are golden brown, about 45 seconds per side.
5. Using a slotted spoon, transfer the ravioli to a plate lined with paper towels to drain. Then, transfer the cooked ravioli to another baking sheet and keep them warm in the 200 degrees F oven while frying the remaining ravioli.
6. Spray the top side of the mint leaves very lightly with nonstick spray. Working with 1 leaf at a time, dredge the coated side of the leaves in sugar to coat lightly.
7. Arrange 2 fried ravioli on each plate. Dust the ravioli with powdered sugar. Garnish with the sugared mint leaves and serve.

Note: The fried ravioli can be prepared 1 day ahead. Cool them completely, then cover and refrigerate. Before serving, place them on a baking sheet and rewarm in a preheated 375 degrees F oven just until they are heated through, about 7 minutes.


P.S. Photos courtesy of Holly. Great job, Holly!

Monday, February 25, 2008

Mung Bean Soup

This is a common Filipino dish that is probably the equivalent of lentil soup here in the United States. It's made of mung bean or "monggo" as we say in our language.

The soup is very easy to make, except that the beans take a while to cook enough to be mashed.

Ingredients:

1 c mung beans, 2 c water (more may be added when boiling), 1 clove garlic, 1 small onion, 1/4 lb meat (whatever you prefer), 1 c veggetables (spinach is suggested but you can use whatever you like)

Directions:

Boil the beans for about 30 minutes. When they're fork tender, mash them up. This will make for a creamy soup.

When the beans are ready, in another pan sautee garlic, onion. When the onions have turned transluscent, add the meat. (I added ground meat to mine.) When the meat is cooked, add the vegetables. (I had left-over broccoli slaw in the fridge so that's what I added in). Continue sauteing for 2-3 mins. and when the veggies have softened up, add the entire sautee mixture to the boiling soup and stir. For more flavor, I added chicken stock to my soup but this is not done tradionally. Season with salt and pepper. Just simmer for another 3 minutes and your soup is done! This soup is very versatile, as most soups are. In my country, we usually add to it a certain leafy vegetable called "kangkong" - very similar to spinach. Some even add a bit of coconut milk for a creamier soup.

The soup is served with steamed rice, to be eaten at best when it is warm.

This is a healthy soup, my ultimate comfort food. Luckily, Mr. J likes it too. Reminds him of the Philippines, he says... (of course!!! )