Saturday, April 12, 2008

Quick-eesh

It's that time of the month again, in our office at least. Time to celebrate somebody's birthday.

The girls at work (yeah, that includes me) started a monthly potluck for birthday celebrants. This was also in an effort to have a chance to fellowship with each other and relax, even if it's just for a few minutes. And it has sort of developed into an official birthday treat for all the birthday guys/gals that month. It's the best excuse to have a potluck, wouldn't you say?

I thought that it would be good to bring something different during our potluck brunch other than donuts, breads or cakes. Does this sound like carb overload? Well, yeah, so I thought, maybe a little protein thrown in the mix wouldn't hurt us. So since last year, I've been making my now famous quiche for the potluck. And since then, it's been requested every time! Darn! Now, I am officially the quiche lady in the office. Hey, at least they like it.... But really, it's my pleasure to do this for them whenever I can.

This recipe is so simple even with my own variation - it's a breeze to do. Makes for a delicious and healthy breakfast, or brunch.

Spinach Quiche
4 eggs
1 cup half-and-half (or for those not from US, combine half milk and half heavy whipping cream)
1/2 cup mayonnaise
2 tablespoons flour
1/3 cup onions, diced + 1 tbsp butter
Salt and garlic powder
8 ounces shredded Swiss or sharp cheddar cheese
1 package frozen chopped spinach (wrung dried)
1 pre-made piecrust


1. Pre-heat oven to 350 degrees F.
2. Place pie crust in a deep, 9-in pie dish, or a tart pan (like I did). Bake for 5-7 minutes. This will prevent soggy crust.
3. Saute onions in the pan with butter , unti it has turned slightly brown. Let it cool.
4. In a large bowl, whisk together the eggs, half-and-half, mayonnaise, and
flour. Add the remaining ingredients, including the cooled onions.
5. Pour the egg mixture into the crust and bake for 45 minutes to 1 hour
or until the top is golden brown.

Additional notes:
- If you want a thicker crust, use two pie crust sheets.
- If reheating the next day, cover with foil to prevent top from being over done.


*** P.S.: My quiche was well done (well, ok, I was distracted by American Idol.. lol). But it was a good accident because the top was a bit crunchy, then the inside was soft, and the crust not soggy.

Wednesday, April 9, 2008

Carrot Cake In A Cup

Ok, not necessarily in a drinking cup as you would think. My original recipe is actually that for a cake. But my hubby requested that I do cupcakes instead, as he wants to take some to work - to share with his co-workers. And since cupcakes are easier to eat (no forks, plates needed), then it seems that this is the best way to go.

Carrot cake is my hubby's absolute favorite. And he's always like a kid when he know's I'm going to make one -- because he's truly the one who enjoys it the most. He eats it as is, or with vanilla ice cream on the side...Yum!

Carrot Cake With Cream Cheese Icing
(Recipe from Great American Home Baking)

2 c cake flour (less 2 tbsps if using all purpose flour)
2 tsps ground cinnamon
1 tsp baking powder
1/4 tsp salt
2/3 c butter, softened
1 c granulated sugar
3 large eggs
3/4 c milk
3 med carrots, grated
1/2 c coarsely chopped walnuts, about 2 oz (or pecan if you prefer)

Frosting
1/2 c (1 stick) butter, softened
4 oz cream cheese, softened
1 tsp vanilla extract
2-1/2 c confectioner's sugar

Topping
1/4 c finely chopped walnuts (about 1 oz)
2 tbsp firmly packed light brown sugar


1. Pre-heat oven to 350 degrees F. Grease a 9-in round cake pan. Dust with flour;
tap our excess.
2. Mix together flour, cinnamon,baking powder and salt.
3. Beat together butter and sugar at medium speed until light and fluffy. Add eggs, 1 at a time beating well after each addition. At low speed, alternately beat flour mixture and milk into butter mixture. Stir in carrots and nuts. Pour batter into prepared pan.
4. Bake cake until top springs back when lightly touched and a toothpick inserted in center comes out clean, 40 minutes. Transfer pan to wire rack to cool for 10 minutes. Turn cake out onto rack to cool completely.
5. To prepare icing, beat together butter and cream cheese at medium speed until completely smooth. Beat in vanilla. Beat in confectioner' sugar until well blended.
6. To prepare topping, mix together nuts and brown sugar.
7. Place cake on a serving plate. Spread icing over top and sides. Sprinkle with nut mixture.

*** NOTE: This time, I opted not to put a topping, but instead, mixed the finely ground walnuts in the frosting. I added 1-2 tbsp of milk to the frosting mixture as the addition of nuts have made the frosting thicker. Also, if you prefer, the icing can be omitted. Instead, dust top of cake with confectioner's sugar and serve.

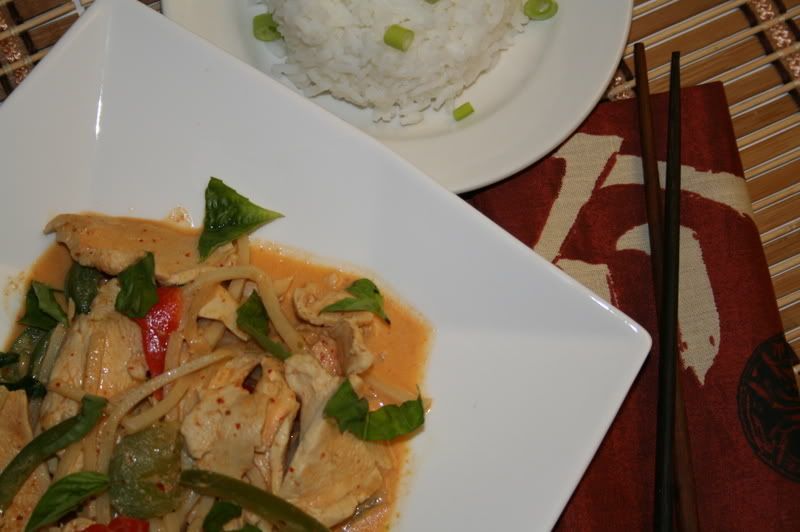
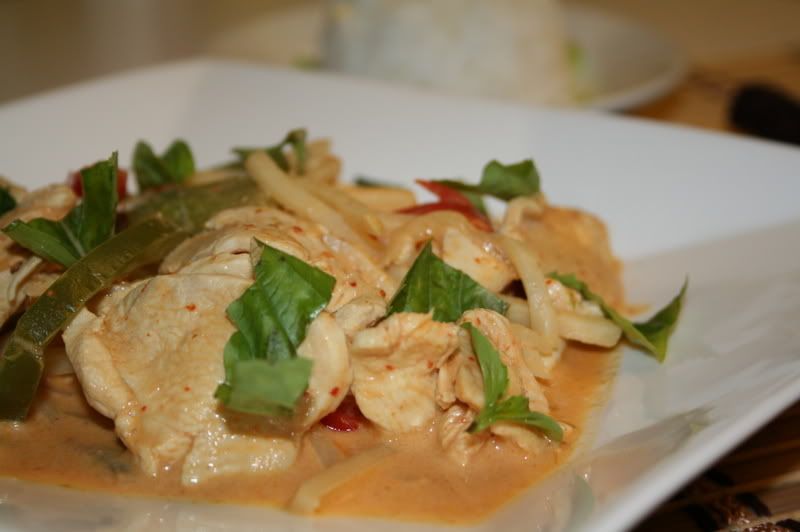
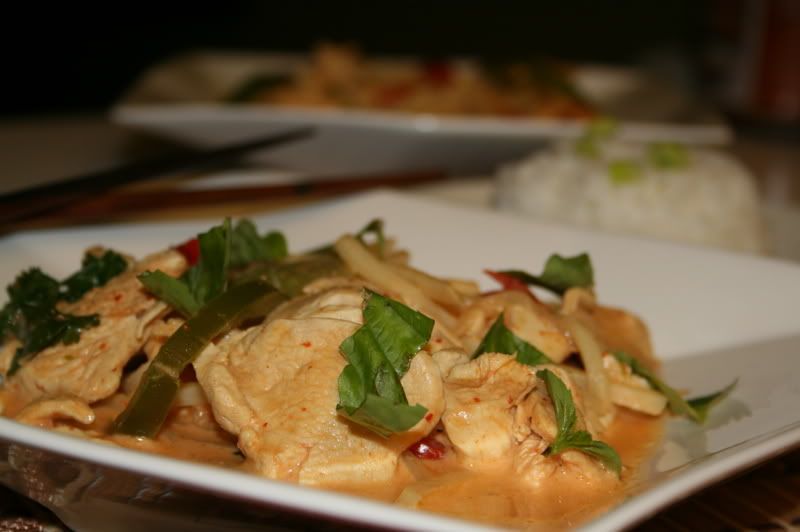
Red Curry With Chicken & Bamboo Shoots

Red, yellow or green. Nope, I'm not describing a flag, nor are these the latest color trends in fashion, but rather, they're the colors of an Asian spice: the curry.

Although curry originated from India, this spice is widely used among the East Asian as well as the South East Asian cuisine. Its color tells you how spicy it is - with red being the most spicy (from red chilies), green-medium (from green chilies) and yellow, mild (from cumin and turmeric). I like 'em all but prefer having them cooked Thai-style, which means, with coconut milk. Combining the curry with coconut milk tends to be more aromatic, it seems to me.

Photobucket

My husband and I love red curry. There's a small Thai-Chinese restaurant we go to when we're craving for Thai food. It's a hole-in-the wall place, but man, their chicken with red curry is the best. I've been craving for red-curry chicken these past days, but this time, I resolved to make it myself. And boy did I enjoy this dish. It's even better the next day!
Photobucket

Red Curry with Chicken & Bamboo Shoots
(recipe adapted from templeofthai.com)

1.5 lb boneless chicken breast
2 tbsp vegetable oil
3 pcs garlic cloves, minced
1/2 medium onion, sliced
2 tsp green onion, chopped
1 can (16 oz) bamboo shoots, sliced
1-2 tbsp red curry paste
1 can coconut milk
1/2 cup basil leaves, torn (if you find Thai sweet basil, much better)
2 tbsp fish sauce

1/4 tsp sea salt
1 1/2 tsp sugar

2 tsps lime zest (approx 1 lime, or 3-4 kaffir lime leaves)
1/4 cup red bell pepper, sliced
1/4 cup green bell pepper, sliced
Cilantro & basil, for ganish

Photobucket

1. Heat oil in pan. When hot, saute onion 'til translucent. Add garlic.
2. Then add chicken pieces. Saute till chicken have turned white.
3. Add red curry paste and stir till curry is well incorporated and oil comes to surface.
4. Then add half of the coconut milk, fish sauce, sugar,bamboo shoots. Go easy on the salt, as remember, the fish sauce is already salty.
5. Then, let the chicken simmer in coconut milk for about 3-4 minutes or until chicken is thoroughly cooked.
6. Then add the rest of the ingredients: red & green peppers, green onions,the rest of the coconut milk. If using kaffir lime leaves, add them at this point. Adjust seasoning. Simmer for 1 minute more.
7. Before serving, garnish with basil leaves and/or cilantro.
8. Serve with steamed rice.


***NOTE: 2 tbsps red curry paste might be too much, so I suggest you start by adding 1 tbsp first. I got carried away and added 2-1/2 tbsps. My hubby found it a bit too spicy. He added a more sugar to balance the heat.

Monday, April 7, 2008

Giniling, a.k.a. Picadillo

Filipino lesson: Giniling (ghee-nee-ling) - refers to anything that's ground; also applies to a dish made from ground meat

Philippine cuisine is very much like a Filipino himself: a result of a mixture of different cultures. There's the influence from the Chinese, Malay, Arab and Indonesian with whom the native Filipinos traded with during the pre-Hispanic era in our country. This economic exchange introduced to our people stuff such as noodles, cumin, soy sauce, fish sauce and others, to name a few.

The discovery of the Philippines in 1521 by a Portuguese explorer Fernando Magallanes (whose service was employed by King Philip of Spain, thus the name "Philip"-pines) marked the beginning of the Spanish occupation in our country lasting for more than 300 years. And it was during this period that our culture, and yes, including our palates, was transformed into what it is now: a fusion of the East and the West, an Asian-Hispanic blend.

This dish that I am sharing with you today is just one of the many East-West combination of flavors. "Giniling" is similar to the Hispanic/Latin American dish called “Picadillo” in that it calls for tomato paste, but different in that it has soy sauce in it too. I made it the way I remember my mother used to do it when I was growing up, but the wine and olives are a new twist, inspired by another blogger, Susan of stickygooeycreamychewy.blogspot.com. Thanks, Susan!

Giniling
1-1/2 lb ground beef (or pork), I used sirloin for lesser fat
3 tbsps olive oil
1 large onion, diced
3 big cloves of garlic, minced
1-1/2 c potatoes, cubed (approx 1 large piece)
1/2 c red bell pepper
1/2 c carrots, diced
1/4 c pimiento stuffed olives
1 handful green peas, thawed
2-3 tbsp tomato paste
2-3 tbsp soy sauce
1/2 c white wine
1 tbsp apple cider vinegar
2 bay leaves (3, if small)
1 tsp smoked paprika
1 tsp ground cumin
1 tsp dried oregano
1 tsp ground cinnamon
1 tsp sugar
Salt and pepper, to taste
Parsely, for garnish

1. Heat your oil in a deep skillet. When hot, sauté onions till translucent. Then add garlic.
2. Sauté for a minute and then add the meat. Cook meat till its done (when brown).
3. Add the potatoes and the carrots. Season with a bit of salt and pepper. Be
careful with your salt since you’ll be adding soy sauce later on.
4. Cover the meat mixture and let it simmer for just 2-3 minutes.
5. Then add the wine. Let is simmer for another 3 minutes or until the wine has
reduced to half its amount.
6. Then add the vinegar and the next 9 ingredients (thru sugar).
7. Cover and simmer until the potatoes are cooked.
8. When potatoes are done, adjust seasoning (add more according to your taste).
9. Add the red bell peppers and the peas just before turning off the heat.
10. Serve with steamed white rice, or yellow rice. Garnish with chopped
parsely/cilantro.

*Note: By all means add more of the liquids (wine, vinegar and soy sauce) in step #6 if you find the meat mixture dry/ or if you just want more sauce. You will need to adjust seasoning accordingly as well.

Friday, April 4, 2008

Man-Go!

Photobucket

Contrary to popular belief, the fruit that Adam ate in the garden of Eden was not apple but mango. Because when God found out that Adam ate the apple at Eve's prompting, God was so upset He told them "man..go!" Wha-ha-ha-ha..
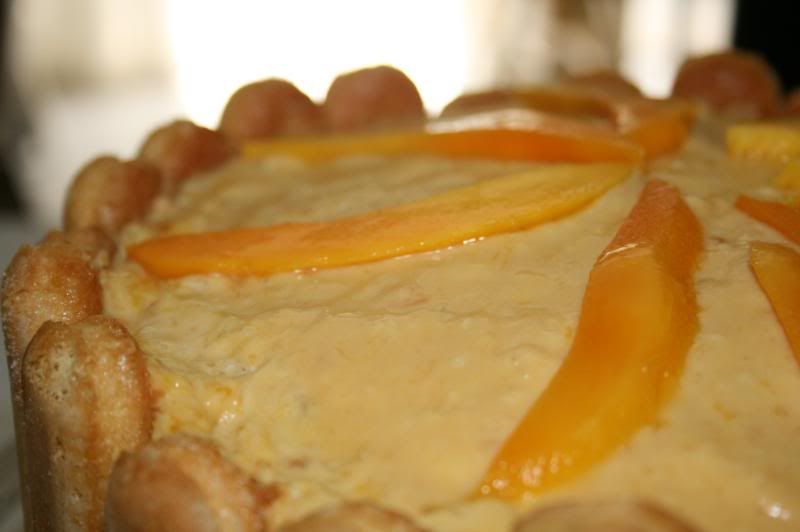
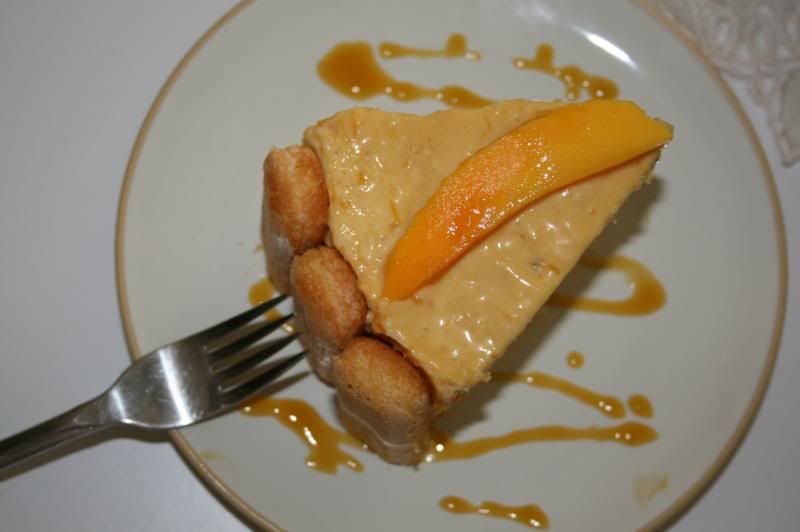
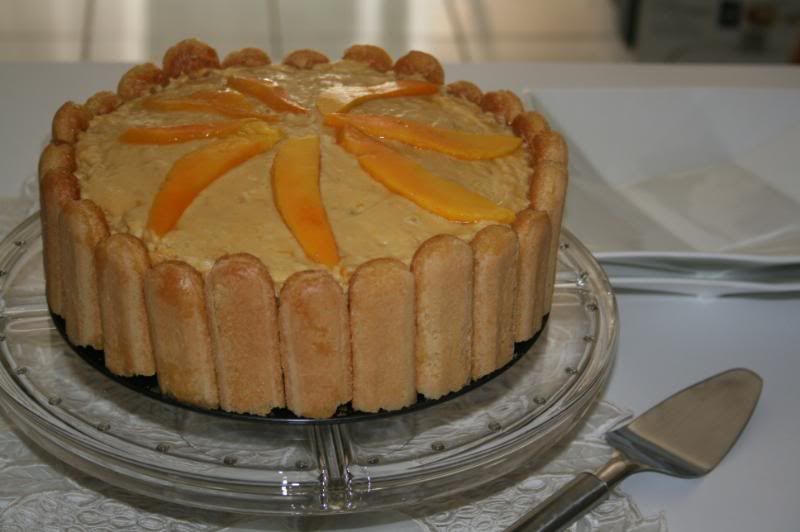
Ok, this is my corny joke for the day and I hope this won't prevent you from reading the rest of this post. I can assure you, this cake is waaaaay better than the joke.. truly mangolicious!
Photobucket

If there was one thing that I miss most in the Philippines gastronomy-wise, on the top of my list would be the mangoes. Philippine mangoes are small, yellowish-gold in color when fully ripe and very, very sweet both in smell and taste. The flesh is tender, juicy and not fibrous like the bigger varieties most common here in Miami.

Last Saturday, one of my Filipina friends gave me some mangoes to my delight. It's the variety (I believe from Mexico) that comes close to the one we have in the Philippines. I knew immediately what I was going to do with them.. some kind of a mango ice-box cake that I used to make a lot when I was in the Philippines.

But then, when I was browsing through some food blogs, I came across a post of novice-baker.blogspot.com, which inspired me to do this cake. I got her recipe, and combined with 2 other recipes I have, I came up with my own version.

Photobucket

Photobucket

Mango Cream Cake
Cake

2 cups cake flour (you may use all-purpose minus 2 tbsps per cup)
2 tsp baking powder

1 tsp baking soda
1-1/4 sticks (3/4 ) unsalted butter, room temperature
1 cup sugar
4 large eggs
3/4 sour milk or buttermilk
3/4 tsp vanilla
3/4 tsp mango extract (optional)
1 cup chopped, stewed mangoes

Filling
1 cup heavy whipping cream
1 cup chopped mangoes, stewed
1 cup mango stew liquid
1 cup chopped, stewed mangoes
2 packs unflavored gelatin powder (recommended, Knox)
1 cup butter
1/2 cup sugar

Topping/Decoration
Set aside 1/2 cup of the filling above
2-3 tablespoons condensed milk
1/4 cup mango puree (from the stewed mangoes)
Fresh mango slices
1 pack Lady Fingers, for lining

Stewing
3 cups mangoes, chopped (about 1 lb, roughly4-5 pcs depending on size)
1-2 cups water
1/2 tsp salt
2-1/2 cups sugar (reduce amount depending on how sweet you want it)

1. Stew mangoes. Combine all the ingredients and cook in high heat, stirring frequently, until thick and clear. Let it rest and cool off.
2. Pre-heat oven to 350 F. Butter two 9x2 inch round cake pan, dust the inside with flour. Shake excess off. Line bottom with parchment or wax paper. Set aside.
3. Sift together cake flour,baking powder, soda and salt.
4. In a large bowl, cream together butter and sugar till fluffy.
5. Add eggs one at a time and beat well after each addition. Beat in vanilla and mango extract (increase amount of vanilla if you don't have vanilla extract).
6. Reduce mixer speed to low and add dry ingredients alternately with sour milk. (Add the dry ingredients in 3 additions and the milk in 2, beginning with the dry ingredients). Mix only until ingredients are incorporated.
7. Fold in stewed mangoes.
8. Divide batter between the prepared pans and bake for 25-30 minutes, or until toothpick inserted into the center of the cake comes out clean. Rotate the pans halfway through the baking time.
9. Transfer cake to a rack to cool off. When cool enough to be handles, run a thin knife around the sides of the cake, invert pan and carefully unmold, peeling of the paper liners. Cool further to room temperature.

While cakes are cooling off, make the filling:
1. In a microwavable bowl, combine the stewed mangoes and the liquid. Add 2 packets of gelatin powder. Microwave in 30 seconds or until gelatin solution dissolved and turns clear. If mixture is thick, add more stewed liquid. Let it cool.
2. In a separate bowl, beat whipping cream until stiff.
3. Fold in whipping cream to the mango-gelatin mixture, carefully and lightly.
4. Set aside 1/2 c of the mixture for topping.


To assemble:
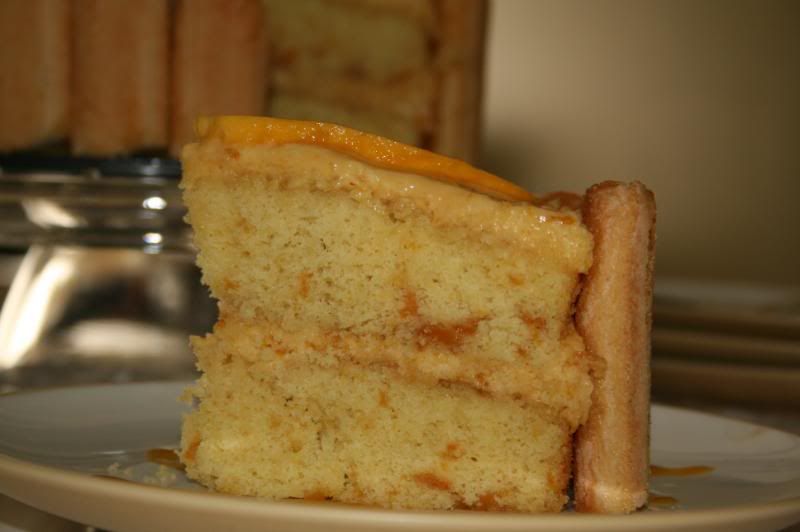
1. Place 1 layer of cake at the bottom of a 9-in spring form pan. Brush top of the cake with the syrup from the stewed mango. (I also tried flattening out the top of the bottom cake layer , as you can se in the photo).
2. Pour the mango cream mixture on top of the cake. Add mango slices, on top if you wish.
3. Brush one side of the lady finger (cut according to height of the pan) with the mango stew syrup and line them on the side of the ring. Brushed side inwards.

4. The put the second layer of cake on top. Repeat procedure #1.
5. For topping, get your reserved 1/2 cup of mango cream and to it add the condensed milk and mango puree. Mix.
6. Pour on top of the cake. Decorate with mango slices.
7. Chill overnight before serving.


*** Note: The mango stew is all an estimation of mine. You may or may not end up with more syrup than required. Also, you may substitute mango with prunes.

Easy Peas-y Casserole

I like eating Orzo pasta, as I can trick my mind into thinking that I'm having rice. We, Filipinos, are big rice eaters , so we are susceptible to any Jedi-mind trick about rice. Hehhehe..

But unlike rice, pasta settles a little heavier in the stomach, so you can't really eat so much of it,especially when drowned with rich meaty or cheesy sauce. But, not this particular dish though. This recipe requires cheese, yes, but not a lot of heavy cream in it.

This dish is versatile too. You can prepare this either as a side dish, or as a complete meal.


Baked Orzo with Peas & Cheese
Casserole
2 cups chicken broth
1/2 pound orzo pasta
1-1/2 tablespoons butter, plus more to grease the baking dish
1/2 medium onion, chopped

1/4 cup diced red bell pepper (optional)
8 ounces mushrooms, sliced
3/4 cup Marsala wine
1/4 cup heavy cream
4 ounces shredded fontina cheese (about 1 cup)
4 ounces diced fresh mozzarella cheese (about 1 cup)
1 cup frozen peas, thawed
1/2 teaspoon salt
1/2 teaspoons freshly ground black pepper

Topping
1/2 cup bread crumbs
1/4 cup grated Parmesan
1 teaspoon dried thyme
1 tbsp butter


1. Preheat the oven to 400 degrees F. Butter a 9 by 13-inch baking dish.
2. Cook orzo with the chicken broth. Cook until almost tender, about 7 minutes. Pour the orzo and the broth into the baking dish. Set aside.
3. Melt the butter over medium heat in a medium skillet. Add the onions and saute until tender, about 3 minutes. Add the mushrooms and continue to saute until the mushrooms are beginning to turn golden around the edges, about 7 minutes.
4. Add the Marsala. Scrape the brown bits off the bottom of the pan and cook until wine has reduced by half, about 5 minutes.
5. Add the mushroom mixture to the orzo in the large bowl. Add the cream, fontina, mozzarella, peas, salt, and pepper. Stir to combine. Pour the mixture into the prepared baking dish.
6. Combine the bread crumbs, parmesan
and dried thyme. Sprinkle the bread crumb mixture on top of the pasta. Dot with butter. Bake uncovered until golden, about 25 minutes.

Option: Add 2 cups pre-cooked shredded chicken to the pasta mix


If you want to make this a complete meal, then you can add the chicken (turkey or shrimp would be good too) in the pasta mix. To make this a vegetarian dish, then you can probably add beans to it, like chick peas or red beans?

As for me, I opted to make it a complete meal - I added shredded cooked chicken breasts. Also, since Fontina is a bit pricier, I got a pre-shredded 6-cheese italian mix which already included Fontina (as well as Romano, Asiago, Parmesan, Mozzarella, Provolone) in it. I have fresh mozzarella in the fridge, so I used them for this dish. The fresh mozzarella added the gooey, sticky factor to this pasta.

This dish is even better eaten the next day.


Thursday, April 3, 2008

How've Ya Bean?

I've always liked beans but I just never realized its benefits until I came across a Cooking Light magazine article about it. Turns out, beans are the most overlooked source of antioxidant-rich foods.

According to the research of Clifford Beninger from the University of Guelph in Ontario, Canada, beans are rich in anthocyanins, an antioxidant with possible anticancer properties.

The darker the bean, the more healthful it is. Black beans therefore, are the most potent, containing 10x the concentration of antioxidants found in oranges and an amount equivalent to that of apples, grapes and cranberries. A half-cup black beans has the same amount of anthocyanins as two glasses of red wine. Beans also has fiber, calcium and B vitamins and are low in fat and slim in calories.


So, black beans, bring it on!

This is my take on a classic Cuban dish of black beans (frijoles negros) and rice. The traditional way of preparing this dish takes long because it requires using the real beans which you need to soak overnight, before boiling it in water the next day for about 1 hour to tenderize them.

But I am not doing it the traditional way. Truth be told, I prefer doing the short-cut version, which makes this dish one of the simplest ones that I can whip up in less than 30 minutes.

Black Beans And Rice
2 cloves garlic, minced (use 1 of you don't like garlic)
1 can (15 oz) black beans
1/2 c size onion, chopped
1/4 c green pepper, chopped
2 tbsp olive oil
Dash of Badia Complete Seasoning (Sason Completa)
Pinch of red pepper flakes or a dash of hot sauce (optional)
Chopped tomatoes or onions, for garnish
Chopped italian flat-leaf parsley or cilantro, for garnish

1. In a skillet, saute onion until translucent, then add garlic and pepper. Saute for one more minute. Add a dash of red pepper flakes, if preferred.
2. In a separate bowl, pour half of the beans from the can and mash with fork. This will help thicken the sauce.
3. Then add to the skillet half of the beans from the can with the liquid, as well as those that you mashed in a separate bowl. Simmer for 2-3 minutes.

4. Season with complete seasoning, salt and pepper to taste.
5. Serve over steamed white rice. Garnish with chopped tomato and parsely.

If you notice, I didn't use green pepper as what I have on hand was the yellow one. If you can't find the Complete Seasoning, use the following combination: dash of garlic powder, dash of cumin, 1 bay leaf, dash of dried oregano and 1-2 tsp vinegar - you just have to adjust amount of seasoning according to your taste.

You can eat this as is for a vegetarian meal, or serve it as a side dish for chicken or pork (in Adobo-style would be good).