Sunday, April 27, 2008

Cassava Butter Cake

Cassava – or "yuca" as most commonly known here in Miami – is a shrubby plant that grows in tropical countries in Asia, Latin America and Africa. It’s most edible parts are the roots (or tuber) and the leaves.

I have good memories playing in the nearby cassava fields with friends when I was young. We used to take some leaves and use its stems to braid each others hair. This plant also has medicinal qualities, or so I believed when I was young. When we get cuts or scrapes from playing, we used take a leaf from the cassava plant and apply the sticky liquid that oozes out from the stem to our wounds.. boy, did it sting!

But I have learned since that cassava is more than just for braiding hairs and healing cuts and scrapes. I’ve also discovered its edible roots and the wonderful, starchy quality it yields when boiled. It is also the source of tapioca which happens to be one of my favorites as well. Here in Miami, I’ve learned that the boiled cassava (or yuca) is also good when sautéed with garlic and onion and eaten with black beans, rice and shredded beef. But my most favorite still remains to be the cassava cake.

Cassava cake is a classic Filipino dessert. I was invited to come to the birthday party of one of my Filipina girlfriends, so I thought of making it. But being here in the US, freshly grated cassava is hard to come by. I can grate them myself but that is such a lot of work! And yes, I can get frozen grated cassava from the Asian store, but I was too lazy to get up and drive for about 30 minutes to get to the store. So, I settled with what I have on hand - cassava flour. An easy cop-out, wouldn't you say?

I have not tried using cassava flour to replace the grated cassava before, but...… it’s time to experiment!!! I just love the suspense.....

Photobucket
Cassava Butter Cake
2 c cassava flour
1 c sugar
1/2 c evap milk
1/2 c coconut milk
1 c young coconut (macapuno)
2 pcs egg (yolk and white beaten separately)
2 tsp baking powder
1/2 c butter
1/2 tsp vanilla

Topping
3 Egg Yokes
1/3 Cup Sweetened Condensed Milk
2/3 Cup Coconut Milk

Procedure
1. Pre-heat oven to 325 degrees F.
2. Sift together the measured baking powder and cassava flour.
3. In a mixing bowl, cream butter until smooth. Add sugar gradually and mix well.
4. Alternately add egg yolk, dry ingredients and milk. Mix thoroughly in one direction until well blended.
5. In a separate mixing bowl, beat the egg white until stiff peak forms.
6. Fold in the mixture to the beaten egg white.
7. Pour the mixture in an ungreased baking pan. Bake for 20-30 minutes or until top is no longer wet.
8. In the meantime, mix well all ingredients for topping. When top of cake is no longer wet, spread topping evenly on cake.
9. Bake an additional 20-30 minutes.
10. Allow to cool before serving.
Photobucket

The result??? It isn’t half as bad as I expected it to be. The cake doesn’t have the usual texture that a grated cassava would give, but it is still sticky. Actually, I liked it, and infact, I will make it again using more coconut milk and less of the evaporated milk next time.

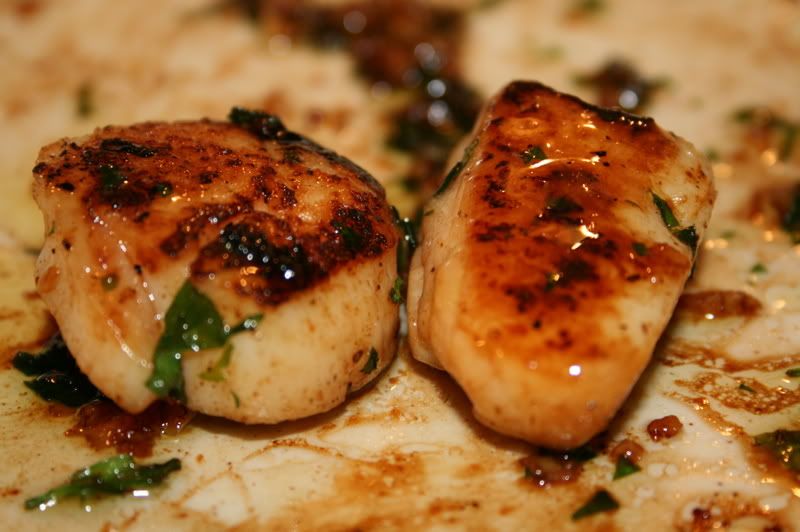
Seared Scallops

Restaurant menus, most of the time, have dishes under the appetizer section that are enough to serve as an entree, for me that is. And I do order those appetizers as my main meal once in a while, especially when I am trying to save enough room for dessert later.. ;o).

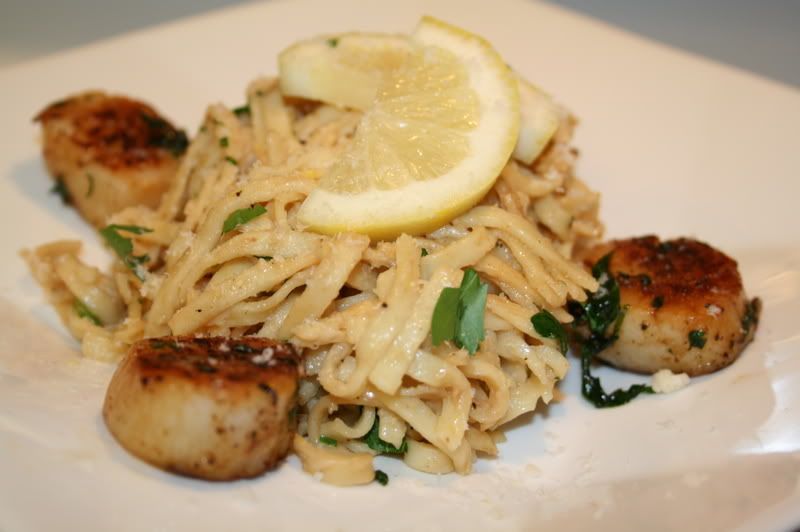
The dish I have here is actually meant as an appetizer,usually served as is, or with bread. But to have it for our dinner, I had to pair it with something substantial. So I served the scallops with pasta in alfredo sauce.

Photobucket

Seared Scallops With Parsley And Garlic
1 lb bay scallops (or 16 large scallops)
1/4 teaspoon salt
1/4 teaspoon freshly ground black pepper
2 pcs anchovy fillets
1-1/2 tablespoons olive oil
2 tablespoons butter
1/4 cup chopped fresh flat-leaf parsley
1 teaspoon lemon zest
1 tablespoon lemon juice
2 garlic cloves, minced

Photobucket

1. Sprinkle scallops with salt and pepper.
2. Heat oil in a large non-stick skillet over medium high heat.
3. Add scallops, saute 2-1/2 minutes on each side or until browned. Set aside and keep warm. Repeat procedure with the remaining scallops. Wipe pan clean with paper towel.
4. Add butter to pan; reduce heat. Add anchovies and cook, stir until fillet has dissolved and melded into the butter.
5. Stir in garlic and parsley. Cook 15 seconds. Return scallops to pan. Toss to coat. Remove from heat and add lemon zest and juice.


Photobucket

I used my favorite bottled 3-cheese alfredo sauce with garlic for the pasta.

NOTE: To perfectly brown scallops, I suggest that you cook them in batches. Add the scallops a few at a time so that the pan will not lose heat. Wait until the oil is hot (when you see ripples in the pan), then add the scallops - do not move them anymore until it is time to flip. The key to browning the scallops is - patience!.

Monday, April 21, 2008

Crab Cake With Dijon Sauce

Photobucket

This dinner is reminiscent of what Mr. J and I had when we went to Christy's restaurant (here in Miami) a few months earlier. I wasn't really interested in ordering an appetizer then, but Mr. J suggested that we get the crab cakes. So I thought, why not? And you know what -- I wished I had the crab cakes for dinner. They were oh soooo good. I think I liked it better than the steak... hahaha.. I just fell in love with their crab cakes and since then, I've vowed to try making my version that I hope would come close to the one we had in that restaurant.

But looking for a good crab cake recipe was a mission. Oh, don't get me wrong, there's ton of recipes out there.. It's just choosing the right one that would get me close to what I had at Christy's proved to be not an easy task. In the end, I had 3 different recipes at hand which I kind of combined to come up with my own version.

I don't know if I even came close to Christy's crab cakes, but this sure was delish. I got a thumbs up from the hubs -- which was all I needed for my efforts to be worthwhile!

Photobucket

Crab Cakes
1 lb crab meat, picked free of shells
1/3 cup panko (japanese breadcrumbs), plus more for dredging
1-1/2 tbsp Emeril's Essence or Old Bay Seasoning
3 tbsp c finely chopped onions
1 stalk scallion (green and white parts only), finely chopped
1/4 cup pimiento
1/4 cup finely chopped red bell pepper
2 tbsp mayonnaise
1 egg, lightly beaten
1 tsp Worcestershire sauce
2 cloves garlic, finely chopped
1 tbsp lemon juice
1 tsp salt
1/4 tsp freshly ground black pepper
1-2 tbsp butter
Olive oil, for sauteeing

1. In a large bowl, mix together all the ingredients except the crab meat, butter and olive oil.
2. When thoroughly mixed, add the crab met. Mix together gently, being careful not to break apart the lumps too much.
3. Using hands, shape the mixture into patties.
4. Place patties in a wax paper lined plate.
5. Refrigerate for 15-20 minutes (or longer).
6. Heat olive oil and butter in a large skillet over medium heat.
7. Take out crab cakes from fridge and dredge patties with panko.
8. When oil is hot, gently pace crab cakes, in batches, in pan and fry till golden brown, about 4-5 minutes on one side.
9. Carefully flip crab cakes and fry on the other side until golden brown, about 4 minutes.
10. Serve with Dijon sauce (recipe follows)

Photobucket

Dijon Sauce
1 tbsp vegetable oil
1 small shallot, minced
1 small garlic clove, minced
pinch of kosher salt
pepper to taste
1 cup white wine
2 tbsp Dijon mustard
1 tbsp butter

1. Saute shallot and garlic in vegetable oil over medium heat, till shallot is transluscent.
2. Add wine to deglaze pan. Reduce liquid for 30 sec to 1 minute, or till wine is half its original amount.
3. Add mustard, salt and pepper. Bring to boil.
4. Remove from heat. Add butter. Stir. Serve with crab cakes.

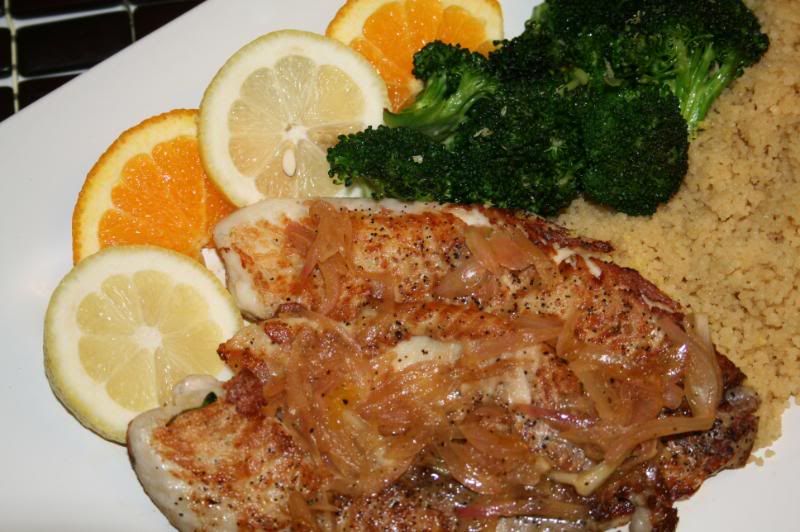
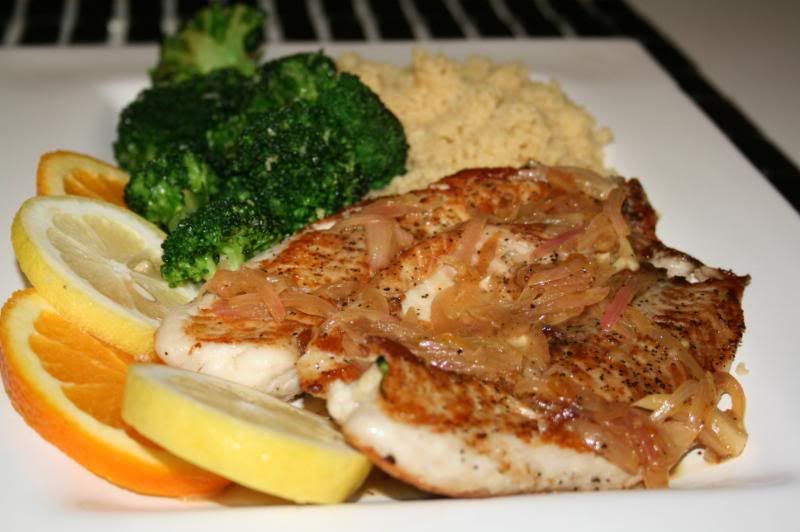
Pan Seared Tilapia With Citrus Vinaigrette

Photobucket


I enjoy watching reality TV shows, especially those that have something to do with cooking. I love learning and experiencing vicariously through the contestants on the show. It is interesting to see how they handle the challenges that are being hurled their way.

One of these shows is the famed Top Chef on Bravo Network. They have what they call the quick fire challenges (minor challenges to test their individual skills) where the winner gets the immunity from elimination for the next major (teamwork) challenge. One of the quickfire challenges that they had was to come up with a dish using just 7 ingredients (if I'm not mistaken), excluding oil, salt, pepper and sugar.

Well, our dinner tonight reminds me of that challenge. This dish only requires a total of 6 ingredients... yes, 6 ingredients, not counting the salt, pepper and oil. And what more, it only takes about 30 minutes to prepare.

I have learned all these years that the best dishes are prepared simply. The flavors of this dish do not disappoint, and I am sure you're going to enjoy this - if you like fish, that is.

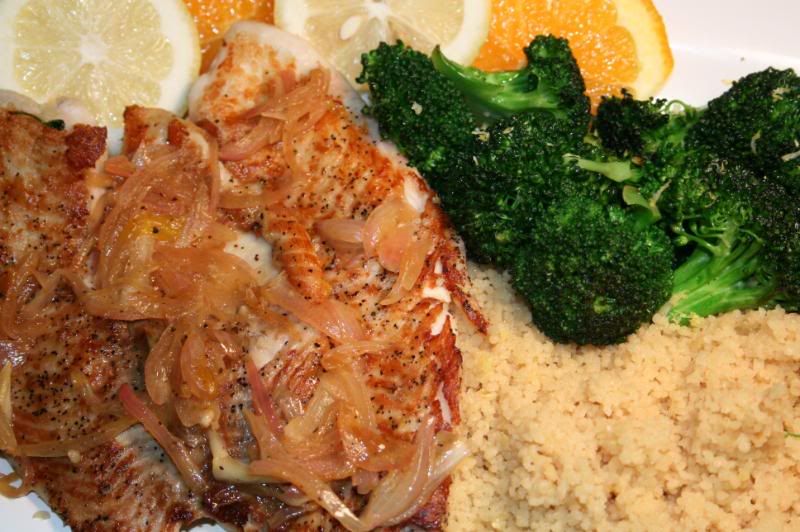
I served the fish with a plain couscous and steamed broccoli with lemon.

Photobucket

Pan Seared Tilapia With Citrus Vinaigrette
(from Cooking Light)
cooking spray
4 (6-oz) tilapia fillets
1/2 teaspoon salt, divided
1/2 teaspoon freshly ground black pepper, divided
1/2 cup white wine
2 tablespoons finely chopped shallots
2 tablespoons fresh lemon juice
2 tablespoons fresh orange juice
4 teaspoons extra virgin olive oil
2 teaspoons white wine vinegar

Photobucket

1. Heat a non-stick skilet over medium-high heat. Coat pan with cooking spray.
2. Sprinkle fish evenly with 1/4 salt and 1/4 pepper.
3. Add fillets to pan. Cook for 4 minutes per side or until fish flakes easily.
4. Remove from pan. Keep warm. (Repeat procedure if you're cooking in two batches)
5. Add white wine to pan. Cook 30 seconds or until liquid almost evaporates.
6. Add shallots and remaining ingredients, stirring well with a whisk.
7. Stir in remaining salt and pepper; saute 1 minute or until thoroughly heated, stirring frequently.
8. Top each serving of fillet with about 3 tbsp of sauce.


NOTE: This dish actually calls for sherry vinegar. So if you have it, I'd recommend you use it instead.

Plain Couscous
1 cup couscous
1 cup chicken broth
1 tbsp butter


1. Bring the chicken broth to a boil.
2. Add the butter, followed by the couscous.
3. Turn off heat. Cover. Let stand for 5 minutes.
4. Fluff couscous with fork and serve
.

Saturday, April 19, 2008

Oh No, Rice Again!

Photobucket

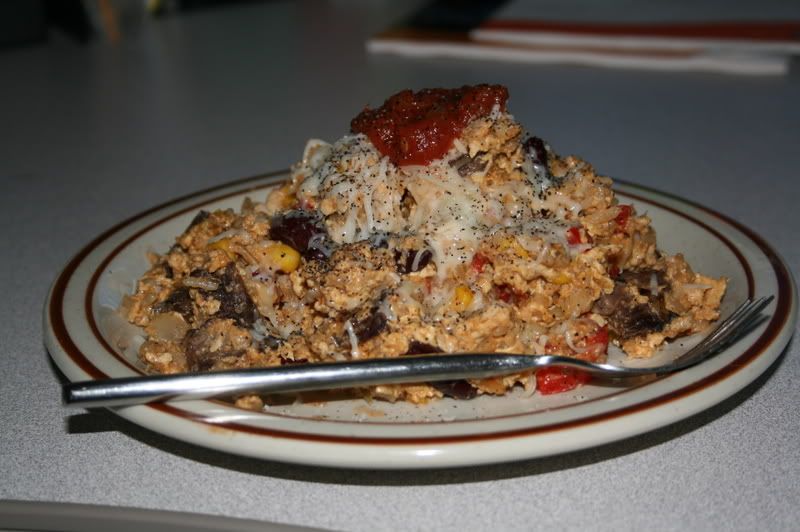
Hey guys...It's mystery chef here, and as it turns out, I found yet another recipe for the rice that I made a few days ago. This time I was inspired to make breakfast for my wife, but for lunch. The ingredients are as follows:

3 tbsp. olive oil
1/4 diced onion
1/4 diced red pepper
1 clove garlic, diced
1/2 cup spanish rice leftovers
2 eggs scrambled
1/4 cup italian blend cheese
1/4 cup salsa
sea salt and ground black pepper (to taste)
1 cup leftover diced grilled churrasco steak (oops thats another recipe...lol)


Photobucket

First, saute the onions an peppers in olive oil, salt and pepper, Then, add the spanish rice, leftover steak and diced garlic continuing to stir heating the mixture thoughly. When ready, add your scrambled eggs into the mixture and fold until it is cooked. Remove from pan and plate, adding dollop of salsa, a few shakes of Tobasco, and your cheese topping and enjoy! Yet another use for rice!

Taste & Create IX: Black Bottom Cupcakes

This month I have managed to participate in a food blogging event , Taste and Create. It is my very first time to do so and I am very excited. And, I'm honored to be partnered with Grace of A Southern Grace. She's a prolific blogger and her site is a veritable source of good recipes.

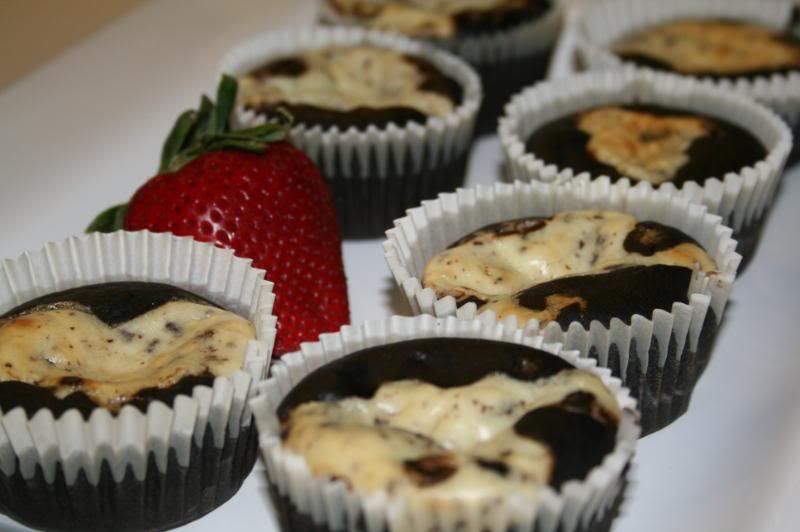
It didn't take me long to decide which of her recipes I should do.. I'm a sucker for sweets and her Bewitching Black Bottom Cupcakes cast its spell on me. Not to mention the fact that she attested to this recipe as something that's been tried, tested and true. I really hoped that I'd do justice to this recipe.
Photobucket
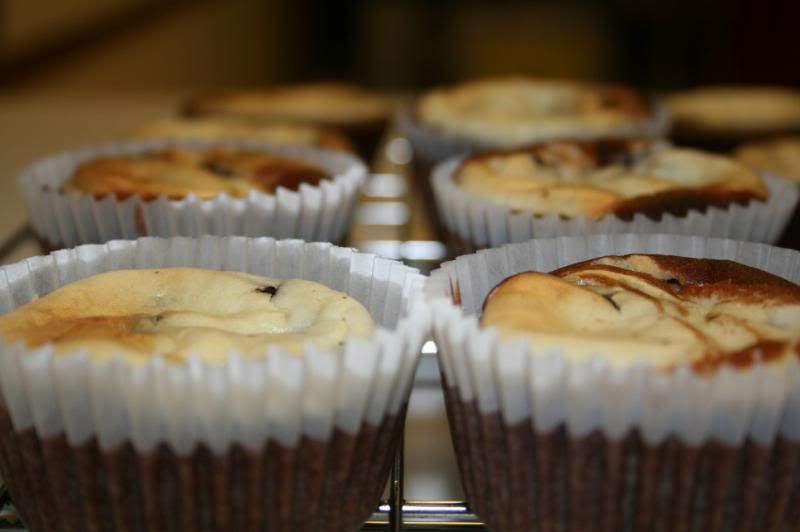
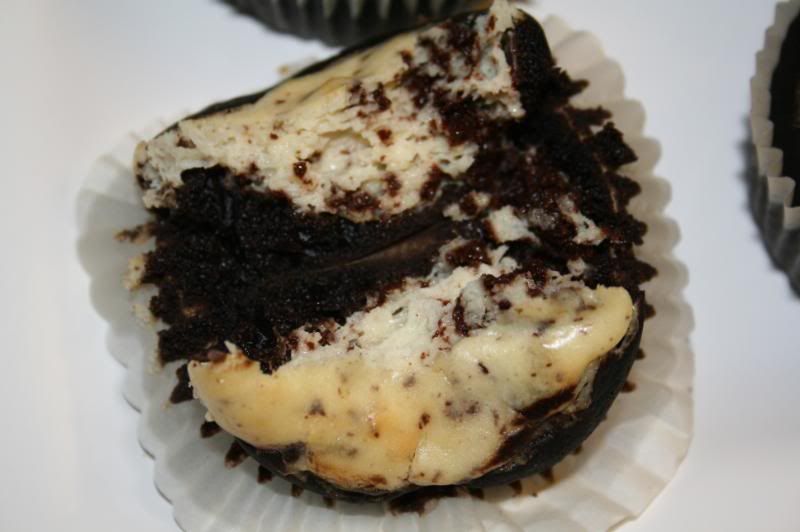
But leave it up to me to mess up an established recipe, lol! I ended up baking the cupcakes two times -- for good reason. I was watching American Idol while baking... bad idea! When the cupcakes came out of the oven, I thought it didn't look anywhere like Grace's. Why???!!!! I followed the recipe, or so I thought. They were very fudgy and obviously, they haven't risen at all... and then it hit me.. I forgot the baking soda! Duh! But hey, they may not look like a million, but they sure tasted good. I used German Black Forest Truffle chocolate and the flavor came out really well.

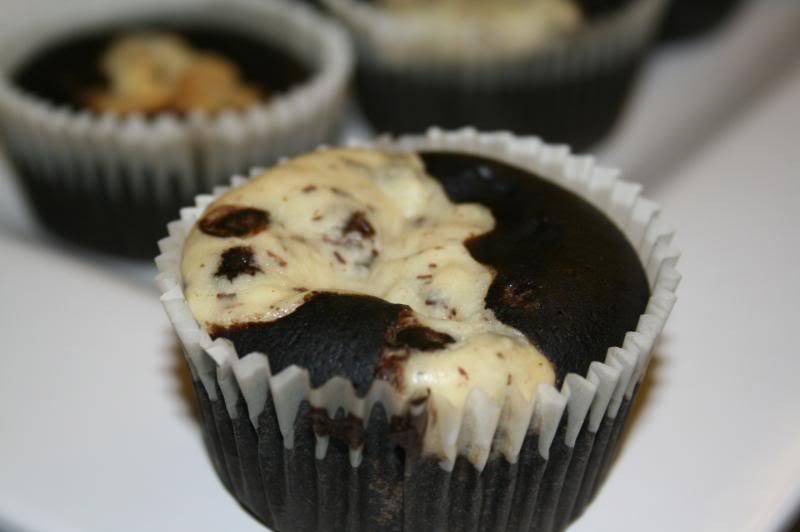
So the next day, I decided I will bake again, but this time, I thought of using Scharfen Berger organic dark chocolate. Unfortunately, there were things in the recipe that I had to change up because I was left with no choice. First, I used the 1/3-less fat cream cheese because this was what I had left in the fridge. I honestly thought I still had a bar of the regular cream cheese, but found out I had none. Second, I didn't have enough of the regular cocoa powder left (which I thought was plenty). The only thing I have available in my cupboard was the dark dutch processed cocoa powder and so I added 2 tbsps of that out of the 5 tbsp that's called for in the recipe. And thirdly - this was totally my choice - I used cake flour instead of the all purpose flour. I wanted the cupcakes to be more cakey and I thought cake flour just might do it.

I felt like I was experimenting with the recipe. I had my fingers crossed the entire baking time, hoping that the cupcakes would come out ok, or at least better than the first batch.... and.. tadaaaahhhh....
Photobucket

Photobucket

Photobucket

They're still not as pretty as Grace's but it certainly looks much better than the first batch I baked. They've risen a bit, but I don't know why they've sunk in the middle. But all that aside, the cupcake looks truly bewitching.. mouthwatering... They're definitely cakier but not as sweet as the first batch I made because of the double dose of dark chocolate in it. It's perfect for coffee or maybe a little bit of vanilla icecream on the side?

And that, my friends, is my very first experience of Taste and Create. Thank you Grace for a beautiful recipe. I learned a valuable lesson - TIVO American Idol when baking!!!!

Friday, April 18, 2008

Hi-jacking the Foodie Blog!

Photobucket

Thats right, I'm hijacking the Foodie Blog...hahaha.

This week there's a guest blogger in the house. Hmmmmm, who could it be?
Me, of course...Well my name is Joe and I am the husband of the best-lookin' filipina chef. Since I'm on vacation for a few weeks, I will be relieving her from most of her cooking & blogging responsibilities. Before you shriek at the thought of me in the kitchen, I will have you know that I do have about 15 years experience in most aspects of the restaurant business, with many of those years spent cooking and preparing tons of food.

Anyway, (((sinister laugh))) I get to finally be creative in the kitchen and blog about it here! F.Y.I., I know this may seem hard to believe, but my wife and I have been married now for 6 years this month (Apr.20) and she has never stopped to complain about cooking for me. She faithfully prepares my breakfast, lunch, and dinner and takes great pride and is joyful when I give her the thumbs-up on her culinary creations. (Very few thumbs-down, btw). Just so you know, I do cook sometimes, and try to help her out as much as possible around the house to show my appreciation for her taking care of me, so be kind to me, please, in your comments, LOL.

Her previous cooking experience was cooking her own native filipino dishes, under the direction of her mother. Since we got married, Jescel's culinary skills have grown immensely by cooking for me and our friends, watching the food network, and catching the food-bug as we get together for dinner with others and asking lots of "How did you do that?" type questions. You go girl!

She has learned so much and is so passionate about food now... How could my stomach ever refuse to let her cook??? Just having Food Network on in the house is a blessing, because we can eat more than just rice! Yehey!

Some co-workers have told me, "Oh wait a year and she'll stop cooking for you" or "You keep eating like that and youre going to get fat". Most of the time my wife prepares food that is not diet oriented, but is substantially healthier than what I could get elsewhere. To see guys drool every morning at what my wife made for me is its own sweet reward --LOL. I know she doesn't hear this nearly enough from me, but "Thank you for taking great care of me... I love you!"

This week I made my own creation, inspired by spanish rice that is good enough to eat as a light lunch, or the next day as the stuffing for a vegetarian, southwest style burrito -MMMMMM..

PhotobucketMMMMM.....

Spanish-Style Rice Ala-Joe
(serves 4 people)

2 cups cooked jasmine rice
3 cups water

pinch of salt
1/2 green pepper, diced
1/2 med onion, diced
2 tbsp olive oil
dash of salt & pepper
2-3 cloves garlic
1 can diced tomatoes (15 oz)
1/2 c tomato paste
1 tsp dried oregano
splash of Merlot wine

1 can red kidney beans (15 oz)
handful of yellow corn kernels
dollop of lite sour cream


1. Bring to a boil the water, add a pinch of salt; add in the jasmine rice, stir and then reduce to simmer for 20 mins.
2. In the meantime , heat olive oil in the pan and saute onions, green pepper until soft. Add a dash of salt and pepper, and then add the garlic. Saute for 1-2 mins, followed by the diced tomatoes and tomato paste to thicken the sauce. Stir until completely incorporated.
3. Then add a pinch of red-pepper flakes for heat,some sea-salt and fresh-gound black pepper to taste, dried oregano and a splash of merlot. Simmer for several minutes more, then remove from heat.
4. Once the rice has cooked, add this to the sauce and mixed it all together. Let mixture cool for a few minutes, then add the red kidney beans (for protein), some yellow corn (for crunch), and voila! It is now ready to serve.

Photobucket

My wife was a little late coming home for lunch, so I began plating and served this with a dollop of lite sour cream and that's all. It made for a very light and nutritious lunch. I knew my wife would like it simply because it had rice (that Asian thing, you know :OP ).

But wait, thats not all. Like I ALWAYS tell my wife, most things that are mixed together like soups, sauces, gravies, etc... are so much better the next day! So, I took my day old, nuevo spanish rice cuisine, and upgraded it for lunch today. I took the leftovers from the 'fridge and scooped enough for the two of us, mixed in

2 tablespoons sour cream,
some smoky paprika,
couple dashes of green tabasco sauce


and heated that up and used that as filling for a sun-dried tomato(flour)-wrap burrito laced with italian-blend of cheese melted on the inside as well as the outside. It was very filling as my wife was unable to eat it all.

Photobucket

Maybe it was the breakfast I made for her that filled her up? This dish was really simple to make and is flexible enough to be used a few different ways on a few different days.

Photobucket

Let us know what you think, ok...and if you've found any different uses for this, too.


Until Later, The Mystery Chef :o)

Thursday, April 17, 2008

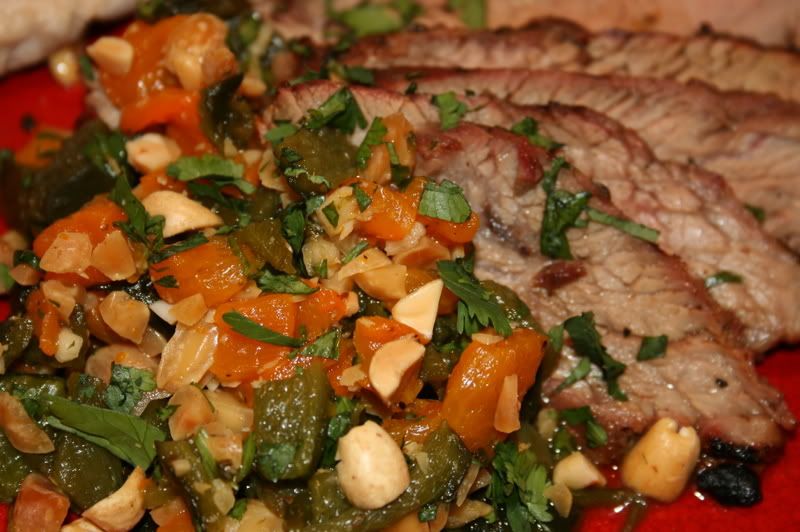
Flank Steak With Five Spice Rub & Chile Relish

Photobucket

One of the challenges of cooking in the middle of the week is making something that is simple, quick and yet packs a lot of flavor. And for us, grilling - steak in particular - is the way to go.

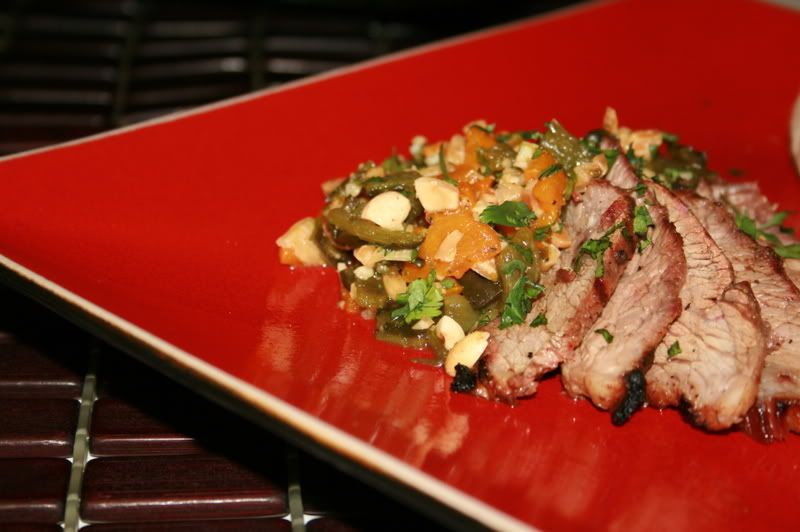
My hubby's most favorite cut of steak is rib-eye, but this time, I ventured into something that we don't usually do - flank steak. I was aware that doing this particular cut would be a challenge as this cut yields a tougher meat, but I really wanted to get acquainted with this part of the cow...hahaha.

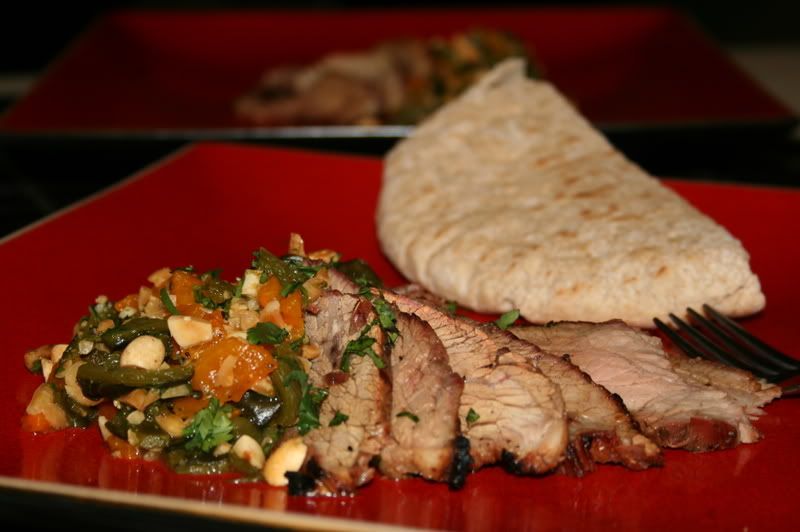
My inspiration came, once again from Cooking Light magazine. I was intrigued by the chile relish and so I decided to try this recipe. And we were not disappointed. The flavors of this dish are so good. Though if you ask me, I'd rather use the skirt steak (churrasco) than the flank...there I said it... I am now convinced that flank is better used for stewing/braising, but not for grilling.

So if you try this recipe (which I hope you would), get the skirt steak. This dish is very good - simple enough for a weeknight dinner but yet, very tasty that you can even entertain with it.

Photobucket

Steak
1 tbsp brown sugar
2 tsp salt
1 tsp ground cumin
1/2 tsp five-spice powder
1/4 tsp ground ginger

1 (2-lb) flank steak, trimmed
cooking spray

1. Prepare grill
2. To prepare steak, combine sugar and next 4 ingredients (thru ginger) in a small bowl. Sprinkle steak with sugar mixture.
3. Place steak on a grill rack coated with cooking spray. Grill 6 mins. on each side or until desired degree of doneness.
4. Cut steak across grain into thin slices.
5. Serve with relish and toasted pita.


Photobucket

Relish
2 poblano chiles
1 orange bell-pepper
1-1/2 tbsp chopped dry-roasted peanuts
1 tbsp chopped fresh cilantro
1 tbsp seasoned rice wine vinegar
1/4 tsp salt
1/4 tsp freshly ground black pepper
1 garlic clove, minced

1. Pre-heat broiler.
2. To prepare relish, cut chiles and bell pepper in half lengthwise; discard seeds and membranes.
3. Place halves, skin side up, on a foil-lined baking sheet, flatten with hand.
4. Broil 15 mins or until blackened.
5. Place in a zip-top plastic bag; seal. Let stand for 15 mins.
6. Peel and chop.
7. Combine chiles, bell pepper and next 6 ingredients (thru garlic) in a small bowl; toss well. Set aside till steak is ready. Serve with steak.

Saturday, April 12, 2008

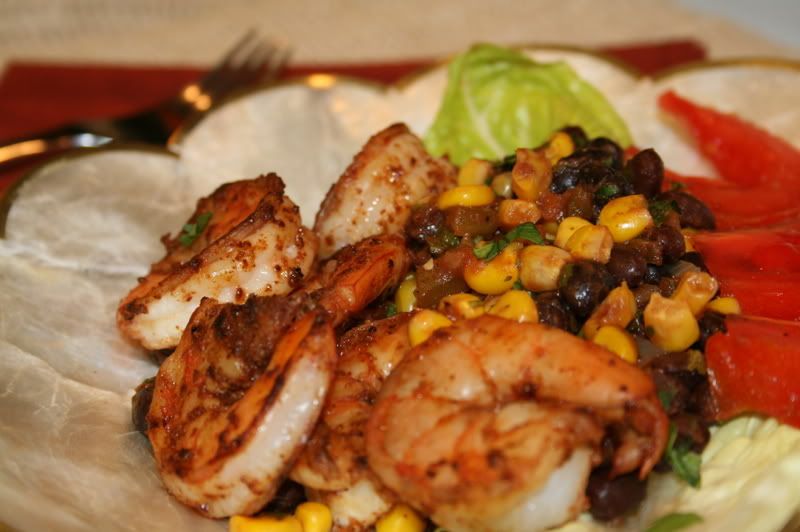
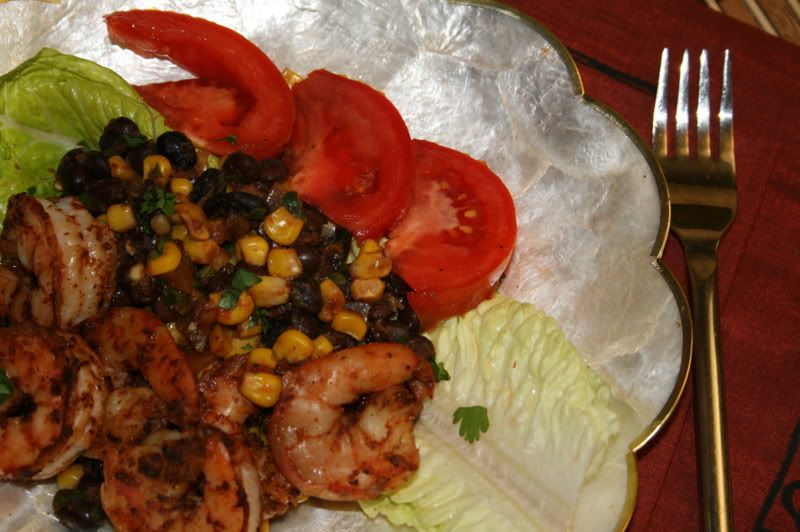
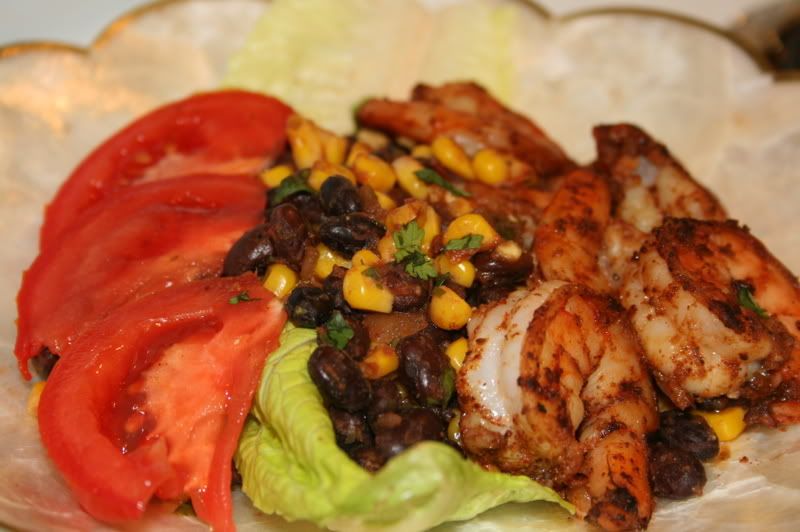
Southwest Style Shrimp

Photobucket

If you look through my food in this blog, there would be one thing that you'll notice - the recipes are no-fuss ones that are quick to make.

Well, this one is not an exception. This whole dinner will take you no more than 30 minutes to prepare, provided that your shrimps have already been shelled and deveined.

This recipe takes on a southwest inspiration. It calls for chili powder. If you're not into spicy food, I suggest that you go easy on this spice. However, I guarantee you that despite the amount of chili powder required in this dish, it is not as spicy as you would expect it to be. And, the black bean and corn salad also balances the heat pretty well.

You may serve this with toasted pita wedges as I did. Or I'd imagine that yellow rice would go well with this too.

Photobucket

Black Bean, Corn & Shrimp Salad
(Yields 4 servings)
1 tbsp chili powder
1/2 tsp garlic powder
1/2 tsp salt
1/2 tsp ground cumin
1-1/2 lb med shrimp, peeled and deveined
Cooking spray
2 tbsp fresh lime juice, divided
1-2/2 c frozen whole kernel corn, thawed
1/4 c bottled salsa
1/4 c chopped fresh cilantro
1 (15-oz) can black beans, rinsed and drained

Photobucket

1. Heat a large nonstick skillet over medium high heat
2. Combine first 3 ingredients in a large bowl. Add shrimp, toss to coat.
3. Coat pan with cooking spray. Add shrimp, saute 3 minutes or until done. Add 1 tbsp lime juice. Remove shrimp from pan. Add corn to pan, saute 1 minute. Stir in salsa, cilantro, and beans, cook 30 seconds or unti thoroughly heated.
4. Stir in 1 tbsp lime juice.
5. Serve shrimp over bean mixture.

Quick-eesh

It's that time of the month again, in our office at least. Time to celebrate somebody's birthday.

The girls at work (yeah, that includes me) started a monthly potluck for birthday celebrants. This was also in an effort to have a chance to fellowship with each other and relax, even if it's just for a few minutes. And it has sort of developed into an official birthday treat for all the birthday guys/gals that month. It's the best excuse to have a potluck, wouldn't you say?

I thought that it would be good to bring something different during our potluck brunch other than donuts, breads or cakes. Does this sound like carb overload? Well, yeah, so I thought, maybe a little protein thrown in the mix wouldn't hurt us. So since last year, I've been making my now famous quiche for the potluck. And since then, it's been requested every time! Darn! Now, I am officially the quiche lady in the office. Hey, at least they like it.... But really, it's my pleasure to do this for them whenever I can.

This recipe is so simple even with my own variation - it's a breeze to do. Makes for a delicious and healthy breakfast, or brunch.

Spinach Quiche
4 eggs
1 cup half-and-half (or for those not from US, combine half milk and half heavy whipping cream)
1/2 cup mayonnaise
2 tablespoons flour
1/3 cup onions, diced + 1 tbsp butter
Salt and garlic powder
8 ounces shredded Swiss or sharp cheddar cheese
1 package frozen chopped spinach (wrung dried)
1 pre-made piecrust


1. Pre-heat oven to 350 degrees F.
2. Place pie crust in a deep, 9-in pie dish, or a tart pan (like I did). Bake for 5-7 minutes. This will prevent soggy crust.
3. Saute onions in the pan with butter , unti it has turned slightly brown. Let it cool.
4. In a large bowl, whisk together the eggs, half-and-half, mayonnaise, and
flour. Add the remaining ingredients, including the cooled onions.
5. Pour the egg mixture into the crust and bake for 45 minutes to 1 hour
or until the top is golden brown.

Additional notes:
- If you want a thicker crust, use two pie crust sheets.
- If reheating the next day, cover with foil to prevent top from being over done.


*** P.S.: My quiche was well done (well, ok, I was distracted by American Idol.. lol). But it was a good accident because the top was a bit crunchy, then the inside was soft, and the crust not soggy.

Wednesday, April 9, 2008

Carrot Cake In A Cup

Ok, not necessarily in a drinking cup as you would think. My original recipe is actually that for a cake. But my hubby requested that I do cupcakes instead, as he wants to take some to work - to share with his co-workers. And since cupcakes are easier to eat (no forks, plates needed), then it seems that this is the best way to go.

Carrot cake is my hubby's absolute favorite. And he's always like a kid when he know's I'm going to make one -- because he's truly the one who enjoys it the most. He eats it as is, or with vanilla ice cream on the side...Yum!

Carrot Cake With Cream Cheese Icing
(Recipe from Great American Home Baking)

2 c cake flour (less 2 tbsps if using all purpose flour)
2 tsps ground cinnamon
1 tsp baking powder
1/4 tsp salt
2/3 c butter, softened
1 c granulated sugar
3 large eggs
3/4 c milk
3 med carrots, grated
1/2 c coarsely chopped walnuts, about 2 oz (or pecan if you prefer)

Frosting
1/2 c (1 stick) butter, softened
4 oz cream cheese, softened
1 tsp vanilla extract
2-1/2 c confectioner's sugar

Topping
1/4 c finely chopped walnuts (about 1 oz)
2 tbsp firmly packed light brown sugar


1. Pre-heat oven to 350 degrees F. Grease a 9-in round cake pan. Dust with flour;
tap our excess.
2. Mix together flour, cinnamon,baking powder and salt.
3. Beat together butter and sugar at medium speed until light and fluffy. Add eggs, 1 at a time beating well after each addition. At low speed, alternately beat flour mixture and milk into butter mixture. Stir in carrots and nuts. Pour batter into prepared pan.
4. Bake cake until top springs back when lightly touched and a toothpick inserted in center comes out clean, 40 minutes. Transfer pan to wire rack to cool for 10 minutes. Turn cake out onto rack to cool completely.
5. To prepare icing, beat together butter and cream cheese at medium speed until completely smooth. Beat in vanilla. Beat in confectioner' sugar until well blended.
6. To prepare topping, mix together nuts and brown sugar.
7. Place cake on a serving plate. Spread icing over top and sides. Sprinkle with nut mixture.

*** NOTE: This time, I opted not to put a topping, but instead, mixed the finely ground walnuts in the frosting. I added 1-2 tbsp of milk to the frosting mixture as the addition of nuts have made the frosting thicker. Also, if you prefer, the icing can be omitted. Instead, dust top of cake with confectioner's sugar and serve.

Red Curry With Chicken & Bamboo Shoots

Red, yellow or green. Nope, I'm not describing a flag, nor are these the latest color trends in fashion, but rather, they're the colors of an Asian spice: the curry.

Although curry originated from India, this spice is widely used among the East Asian as well as the South East Asian cuisine. Its color tells you how spicy it is - with red being the most spicy (from red chilies), green-medium (from green chilies) and yellow, mild (from cumin and turmeric). I like 'em all but prefer having them cooked Thai-style, which means, with coconut milk. Combining the curry with coconut milk tends to be more aromatic, it seems to me.

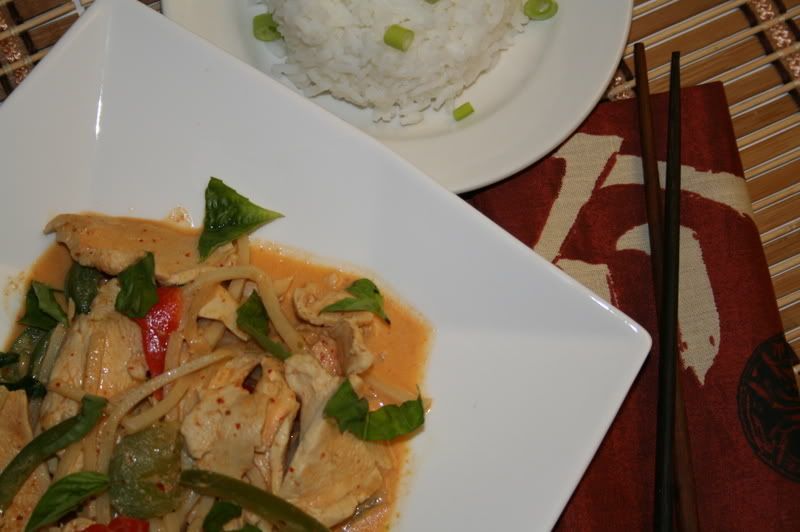
Photobucket

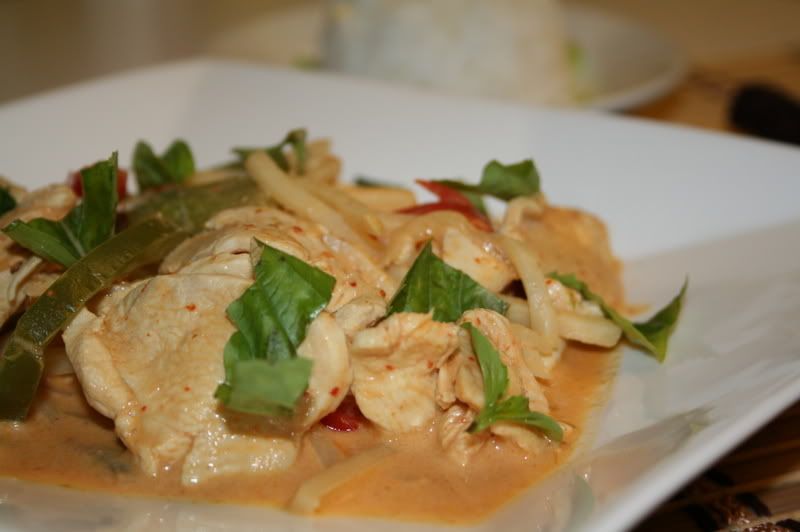
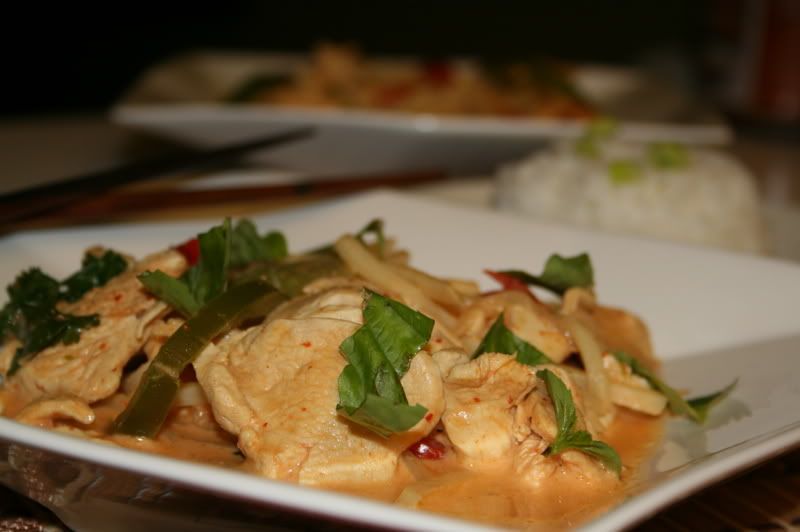
My husband and I love red curry. There's a small Thai-Chinese restaurant we go to when we're craving for Thai food. It's a hole-in-the wall place, but man, their chicken with red curry is the best. I've been craving for red-curry chicken these past days, but this time, I resolved to make it myself. And boy did I enjoy this dish. It's even better the next day!
Photobucket

Red Curry with Chicken & Bamboo Shoots
(recipe adapted from templeofthai.com)

1.5 lb boneless chicken breast
2 tbsp vegetable oil
3 pcs garlic cloves, minced
1/2 medium onion, sliced
2 tsp green onion, chopped
1 can (16 oz) bamboo shoots, sliced
1-2 tbsp red curry paste
1 can coconut milk
1/2 cup basil leaves, torn (if you find Thai sweet basil, much better)
2 tbsp fish sauce

1/4 tsp sea salt
1 1/2 tsp sugar

2 tsps lime zest (approx 1 lime, or 3-4 kaffir lime leaves)
1/4 cup red bell pepper, sliced
1/4 cup green bell pepper, sliced
Cilantro & basil, for ganish

Photobucket

1. Heat oil in pan. When hot, saute onion 'til translucent. Add garlic.
2. Then add chicken pieces. Saute till chicken have turned white.
3. Add red curry paste and stir till curry is well incorporated and oil comes to surface.
4. Then add half of the coconut milk, fish sauce, sugar,bamboo shoots. Go easy on the salt, as remember, the fish sauce is already salty.
5. Then, let the chicken simmer in coconut milk for about 3-4 minutes or until chicken is thoroughly cooked.
6. Then add the rest of the ingredients: red & green peppers, green onions,the rest of the coconut milk. If using kaffir lime leaves, add them at this point. Adjust seasoning. Simmer for 1 minute more.
7. Before serving, garnish with basil leaves and/or cilantro.
8. Serve with steamed rice.


***NOTE: 2 tbsps red curry paste might be too much, so I suggest you start by adding 1 tbsp first. I got carried away and added 2-1/2 tbsps. My hubby found it a bit too spicy. He added a more sugar to balance the heat.

Monday, April 7, 2008

Giniling, a.k.a. Picadillo

Filipino lesson: Giniling (ghee-nee-ling) - refers to anything that's ground; also applies to a dish made from ground meat

Philippine cuisine is very much like a Filipino himself: a result of a mixture of different cultures. There's the influence from the Chinese, Malay, Arab and Indonesian with whom the native Filipinos traded with during the pre-Hispanic era in our country. This economic exchange introduced to our people stuff such as noodles, cumin, soy sauce, fish sauce and others, to name a few.

The discovery of the Philippines in 1521 by a Portuguese explorer Fernando Magallanes (whose service was employed by King Philip of Spain, thus the name "Philip"-pines) marked the beginning of the Spanish occupation in our country lasting for more than 300 years. And it was during this period that our culture, and yes, including our palates, was transformed into what it is now: a fusion of the East and the West, an Asian-Hispanic blend.

This dish that I am sharing with you today is just one of the many East-West combination of flavors. "Giniling" is similar to the Hispanic/Latin American dish called “Picadillo” in that it calls for tomato paste, but different in that it has soy sauce in it too. I made it the way I remember my mother used to do it when I was growing up, but the wine and olives are a new twist, inspired by another blogger, Susan of stickygooeycreamychewy.blogspot.com. Thanks, Susan!

Giniling
1-1/2 lb ground beef (or pork), I used sirloin for lesser fat
3 tbsps olive oil
1 large onion, diced
3 big cloves of garlic, minced
1-1/2 c potatoes, cubed (approx 1 large piece)
1/2 c red bell pepper
1/2 c carrots, diced
1/4 c pimiento stuffed olives
1 handful green peas, thawed
2-3 tbsp tomato paste
2-3 tbsp soy sauce
1/2 c white wine
1 tbsp apple cider vinegar
2 bay leaves (3, if small)
1 tsp smoked paprika
1 tsp ground cumin
1 tsp dried oregano
1 tsp ground cinnamon
1 tsp sugar
Salt and pepper, to taste
Parsely, for garnish

1. Heat your oil in a deep skillet. When hot, sauté onions till translucent. Then add garlic.
2. Sauté for a minute and then add the meat. Cook meat till its done (when brown).
3. Add the potatoes and the carrots. Season with a bit of salt and pepper. Be
careful with your salt since you’ll be adding soy sauce later on.
4. Cover the meat mixture and let it simmer for just 2-3 minutes.
5. Then add the wine. Let is simmer for another 3 minutes or until the wine has
reduced to half its amount.
6. Then add the vinegar and the next 9 ingredients (thru sugar).
7. Cover and simmer until the potatoes are cooked.
8. When potatoes are done, adjust seasoning (add more according to your taste).
9. Add the red bell peppers and the peas just before turning off the heat.
10. Serve with steamed white rice, or yellow rice. Garnish with chopped
parsely/cilantro.

*Note: By all means add more of the liquids (wine, vinegar and soy sauce) in step #6 if you find the meat mixture dry/ or if you just want more sauce. You will need to adjust seasoning accordingly as well.

Friday, April 4, 2008

Man-Go!

Photobucket

Contrary to popular belief, the fruit that Adam ate in the garden of Eden was not apple but mango. Because when God found out that Adam ate the apple at Eve's prompting, God was so upset He told them "man..go!" Wha-ha-ha-ha..
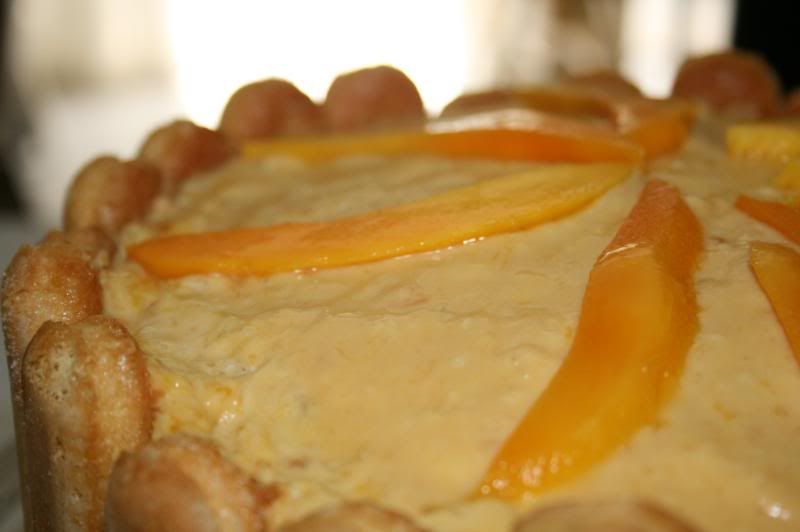
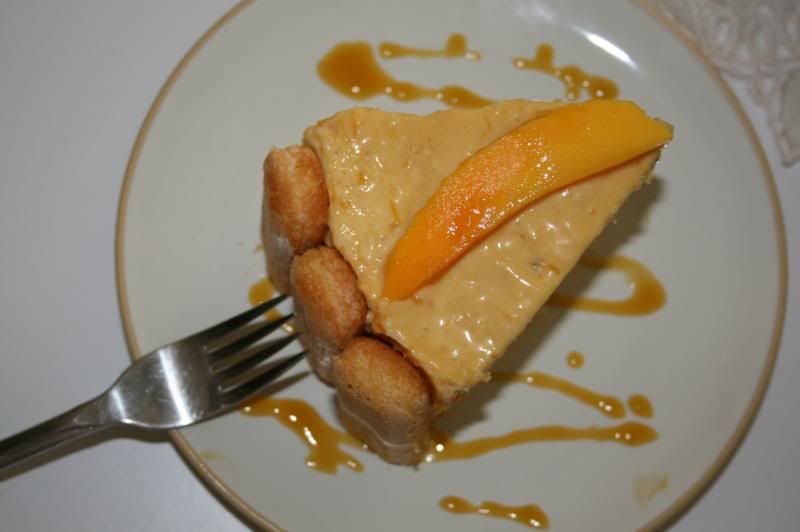
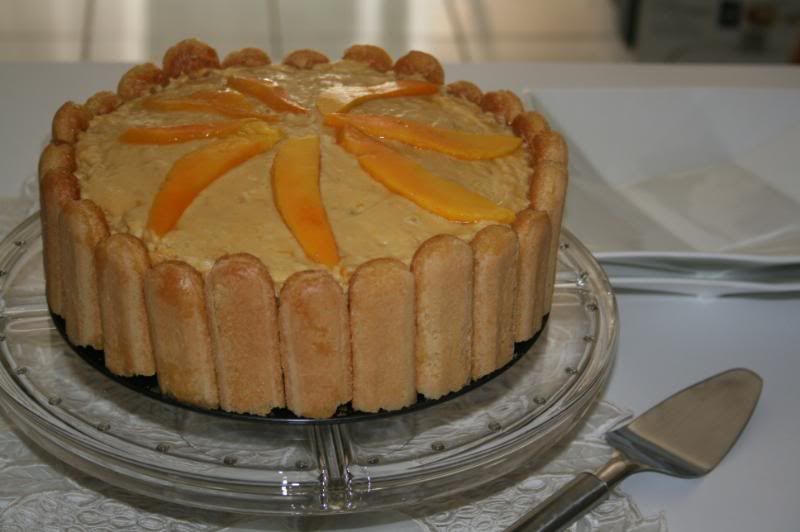
Ok, this is my corny joke for the day and I hope this won't prevent you from reading the rest of this post. I can assure you, this cake is waaaaay better than the joke.. truly mangolicious!
Photobucket

If there was one thing that I miss most in the Philippines gastronomy-wise, on the top of my list would be the mangoes. Philippine mangoes are small, yellowish-gold in color when fully ripe and very, very sweet both in smell and taste. The flesh is tender, juicy and not fibrous like the bigger varieties most common here in Miami.

Last Saturday, one of my Filipina friends gave me some mangoes to my delight. It's the variety (I believe from Mexico) that comes close to the one we have in the Philippines. I knew immediately what I was going to do with them.. some kind of a mango ice-box cake that I used to make a lot when I was in the Philippines.

But then, when I was browsing through some food blogs, I came across a post of novice-baker.blogspot.com, which inspired me to do this cake. I got her recipe, and combined with 2 other recipes I have, I came up with my own version.

Photobucket

Photobucket

Mango Cream Cake
Cake

2 cups cake flour (you may use all-purpose minus 2 tbsps per cup)
2 tsp baking powder

1 tsp baking soda
1-1/4 sticks (3/4 ) unsalted butter, room temperature
1 cup sugar
4 large eggs
3/4 sour milk or buttermilk
3/4 tsp vanilla
3/4 tsp mango extract (optional)
1 cup chopped, stewed mangoes

Filling
1 cup heavy whipping cream
1 cup chopped mangoes, stewed
1 cup mango stew liquid
1 cup chopped, stewed mangoes
2 packs unflavored gelatin powder (recommended, Knox)
1 cup butter
1/2 cup sugar

Topping/Decoration
Set aside 1/2 cup of the filling above
2-3 tablespoons condensed milk
1/4 cup mango puree (from the stewed mangoes)
Fresh mango slices
1 pack Lady Fingers, for lining

Stewing
3 cups mangoes, chopped (about 1 lb, roughly4-5 pcs depending on size)
1-2 cups water
1/2 tsp salt
2-1/2 cups sugar (reduce amount depending on how sweet you want it)

1. Stew mangoes. Combine all the ingredients and cook in high heat, stirring frequently, until thick and clear. Let it rest and cool off.
2. Pre-heat oven to 350 F. Butter two 9x2 inch round cake pan, dust the inside with flour. Shake excess off. Line bottom with parchment or wax paper. Set aside.
3. Sift together cake flour,baking powder, soda and salt.
4. In a large bowl, cream together butter and sugar till fluffy.
5. Add eggs one at a time and beat well after each addition. Beat in vanilla and mango extract (increase amount of vanilla if you don't have vanilla extract).
6. Reduce mixer speed to low and add dry ingredients alternately with sour milk. (Add the dry ingredients in 3 additions and the milk in 2, beginning with the dry ingredients). Mix only until ingredients are incorporated.
7. Fold in stewed mangoes.
8. Divide batter between the prepared pans and bake for 25-30 minutes, or until toothpick inserted into the center of the cake comes out clean. Rotate the pans halfway through the baking time.
9. Transfer cake to a rack to cool off. When cool enough to be handles, run a thin knife around the sides of the cake, invert pan and carefully unmold, peeling of the paper liners. Cool further to room temperature.

While cakes are cooling off, make the filling:
1. In a microwavable bowl, combine the stewed mangoes and the liquid. Add 2 packets of gelatin powder. Microwave in 30 seconds or until gelatin solution dissolved and turns clear. If mixture is thick, add more stewed liquid. Let it cool.
2. In a separate bowl, beat whipping cream until stiff.
3. Fold in whipping cream to the mango-gelatin mixture, carefully and lightly.
4. Set aside 1/2 c of the mixture for topping.


To assemble:
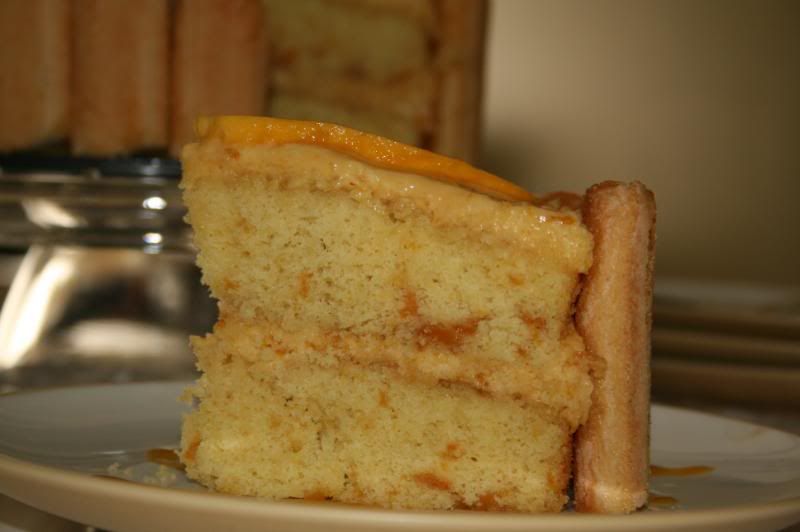
1. Place 1 layer of cake at the bottom of a 9-in spring form pan. Brush top of the cake with the syrup from the stewed mango. (I also tried flattening out the top of the bottom cake layer , as you can se in the photo).
2. Pour the mango cream mixture on top of the cake. Add mango slices, on top if you wish.
3. Brush one side of the lady finger (cut according to height of the pan) with the mango stew syrup and line them on the side of the ring. Brushed side inwards.

4. The put the second layer of cake on top. Repeat procedure #1.
5. For topping, get your reserved 1/2 cup of mango cream and to it add the condensed milk and mango puree. Mix.
6. Pour on top of the cake. Decorate with mango slices.
7. Chill overnight before serving.


*** Note: The mango stew is all an estimation of mine. You may or may not end up with more syrup than required. Also, you may substitute mango with prunes.